
You can join this QAL at any time. The starter post is here and the Flickr group for posting your photos is here. As you know, I am doing this QAL as a QAYG (Quilt as You Go) where you quilt each block before assembling the quilt. The method I chose to use came from Penny Sewtakeahike's blog where you quilt with the top and the wadding then join all the blocks together using 1/4" seams then attach a backing in one piece quilting along the seam lines and perhaps around some of the details within the blocks to keep the backing tightly attached. I will be showing you how I do this but think that a better method, given that these blocks are so large, was shown in the two previous posts on this blog.
1. Cut out a piece of wadding an inch or two bigger all round than each of your blocks. Did you know that batting has a right side and a wrong side? Get a sewing machine needle and poke it into the batting from each side - it will be much easier to poke it in from one side than the other so that is the side you want facing up. Place your block on top and iron if necessary to smooth everything out then baste (I use safety pins). If you are using the method from the previous two posts, you will also need to add a square of backing at this point.

2. Quilt as desired leaving the outer sashing unquilted if you are using the method from the previous two posts. I quilted using a spiral over the dresden leaves, straight line quilting in the outer sashing and then different types of FMQ for each block in the remaining background fabric in the inner circle and on the backing that surrounds the outer circle.
3. To quilt in a spiral, first decide how far apart you want your quilting lines to be. I decided on 1 1/2". Then place a line of pins which move slowly away from the inner circle until, after one whole rotation of the block, you have reached 1 12/" away from the inner circle.

4. Sew once around the inner circle using your walking foot if you have one and with the stitches set to nice and long (I set mine to 5) and then follow the pins out until the final one.

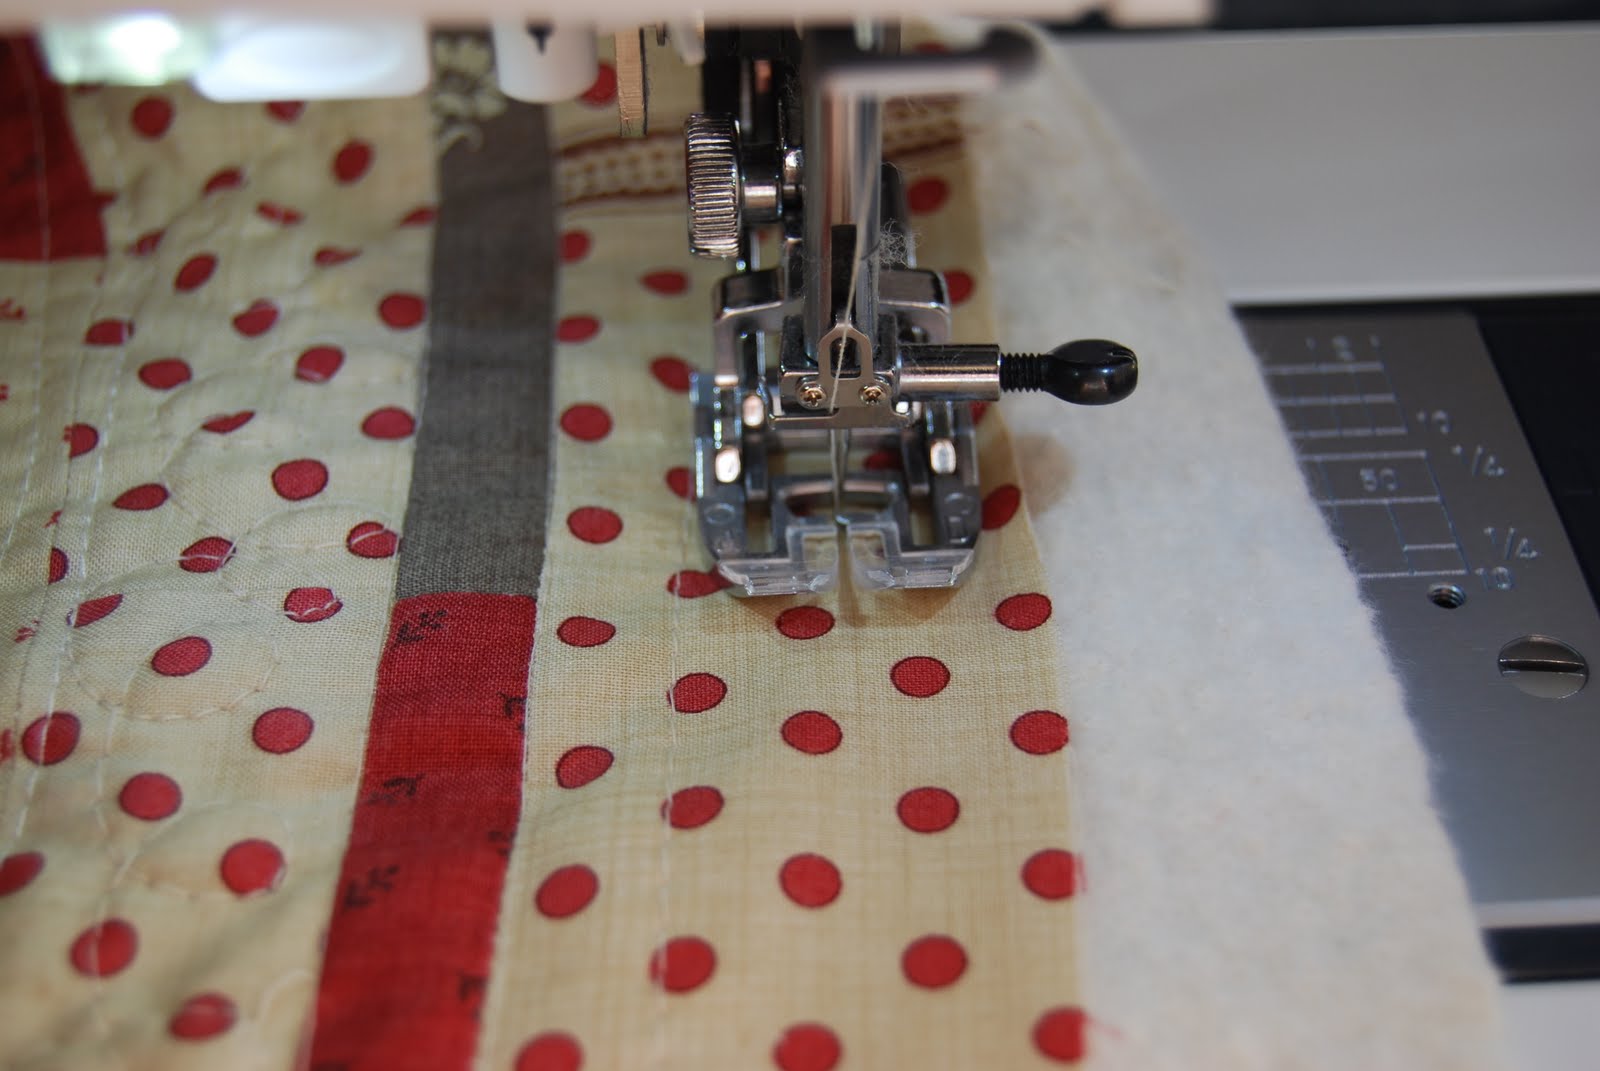
5. Then set a quilt line spacer to 1 1/2" and just keep following the line until you reach the outer circle.

6. Loop once around the outer circle then stop.

7. Remove the walking foot and swap it for a FMQ (free motion quilting) foot if you have one, lower your feed dogs if you can and FMQ the inner circle and then the background fabric between the circle and the skinny sashing.

8. Swap back to your walking foot, raise the feed dogs back up and quilt a series of straight lines along the outer sashing strips.
Here is one of my finished blocks hanging on the line. I am pretty remedial at quilting so please don't take much in the way of advice from me on this topic but I just thought I would walk you through what I did in case you were looking for ideas. Now the issue with this photo is that you can't see the quilting so you just have to pretend you can. Please would as many of you as possible leave comments gasping at the geniosity (made up word) of my quilting even thought you can't see it.

Oh! Did you hear that? It was me fainting on my keyboard after becoming thoroughly overwhelmed at your intricate and gorgeous quilting. I'm awake now, though and must let you know that never in my life have I seen a perfect example of quilting until just now here on your blog. You've changed my life. In fact, I don't know if I can ever quilt again knowing that this perfection exists and I can only dream of attaining it. I'm a tied-quilt girl forevermore now...
ReplyDelete;) You're cute Lynne. I'm sure your quilting is far more than adequate and I do wish I could see the details :)
OMG Thanks so much for sharing that batting has a wrong and right side! That explains the few problems I have been having! My other quilt I am currently doing the same method as you, and I couldn't get the basting safety pins to go through the batting (it was really hard) and then on others it was easy, now I know why! I can't wait to quilt mine like yours!
ReplyDelete**GASP** That quilting is just fabulous! I'm truly amazed .....
ReplyDeleteLynne, I've come over all faint... I think it was the sight of your gorgeous dresden panel that sent me weak at the knees :-)
ReplyDeleteGood one girly!
You exhibit so much geniosity in your quilting that I have no words to describe it! It is just overwhelming...
ReplyDeleteThe most genius thing about your genius quilting, is that it is holding 3 layers together while being completely undetectable by cameras and therefore invisible. You have superquiltpowers. I know it's there because you said it is (and i trust you). I also know it looks fabulous, so stop it with the remedial nonsense already!
ReplyDeleteThanks so much for sharing! I've learned a lot from this blog. Who knew that batting had right and wrong sides? I can't wait to try your spiral quilting and QAYG techniques.
ReplyDeleteI need more feet!!
ReplyDeleteI had no idea about batting right side/ wrong side- a handy bit of info there!
ReplyDeleteI had no idea that batting had a right and wrong side. I knew thread had a direction but batting? Live and learn and admire your lovely block. Mission accomplished!
ReplyDeleteThread has a direction???? Who knew.
ReplyDeleteI'm freaking out at the amazingness of the invisible quilting!!!
ReplyDeleteAnd I belong to the in-the-dark group who never knew that batting has a wrong side. So thanks for enlightening us!
Your quilting is Fab U lous Lynne!
ReplyDeleteI have never seen quilting like that before!!! What do you mean that we can't see the quilting lines - of course we can!!!
ReplyDeleteBatting has a wrong side? This little revelation will go a long way to easing basting... thanks! And, that extra bit of the walking foot, so thats what its for!! Doh, I suppose that was obvious to most people...
ReplyDeletefab post many thanks, kudo's for the courage to post your beginning pieces online, I think they turned out great and I am loving the idea of qayg. Many many thanks for the wonderful tutorials!
ReplyDelete