

Materials From Abakhan
1 metre Camouflage Fleece for the front
1 metre Spot Fleece for the back
Felt or a fabric Velcro will stick to - the amount and colour depends on your applique shapes. I used:-
1 Orange 30.5cm x 30.5cm square
1 Red pack 8 A4 sheets - this included also the brownish colour for the bears on the back
5 Black 30.5cm x 30.5cm square or buy 1 metre
2 metres Orange Bias Binding 25mm wide - for the hanging loops
1 pack Velcro Ties - to hold it up easily....hopefully no knots for little fingers!
How to make...
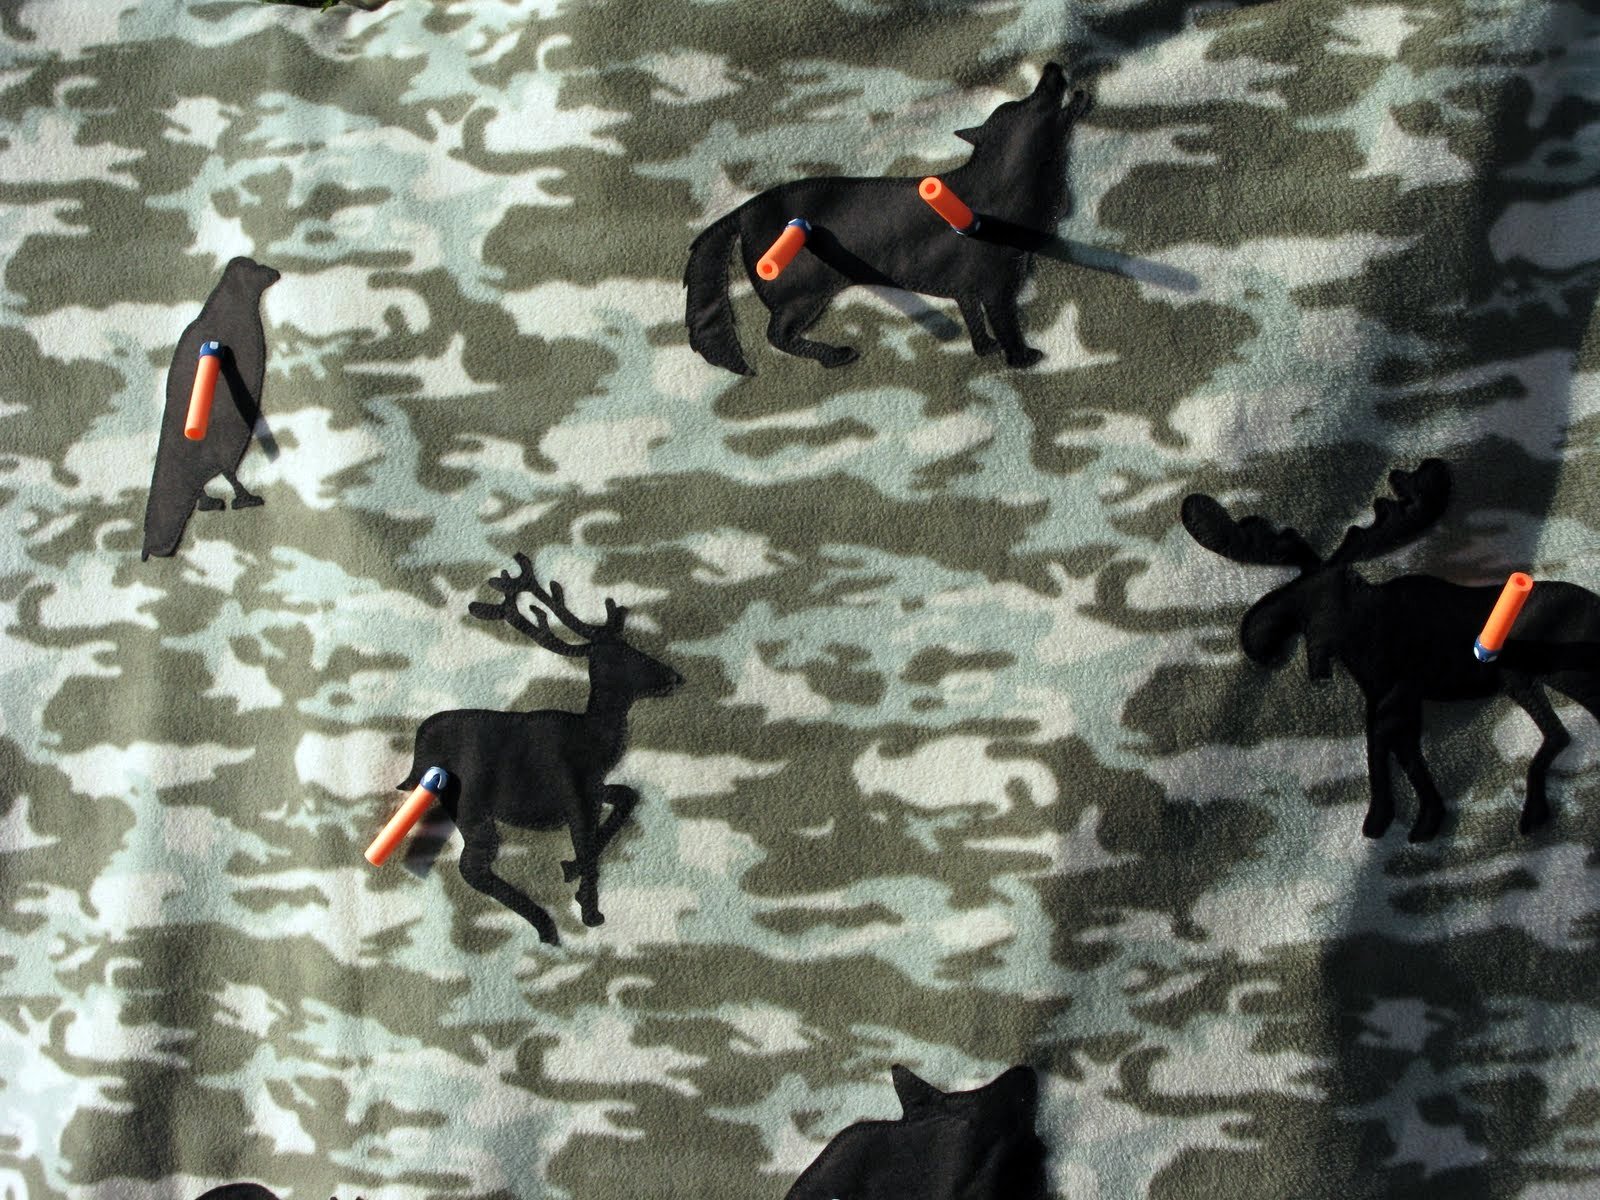
1. Select your targets
I chose traditional targets, but you can easily Google dinosaurs, planes or flowers for different options. You could ask the recipient what they would like to shoot at.....in this case he probably would have asked for a target of his "evil sister"....though I know he hates slugs and snails too!
Here are just a few ideas. The outlines were mainly children's colouring pages, but I found if I changed the colour of the black ones to grey before I printed them off then it saved on printer ink.

2. Select layout
Once you have your targets printed off lay them out in your chosen design. These are all A4 sheets of printer paper and I needed to reverse the bird in the top left corner.

3. Cut out felt shapes
Cut out all your chosen shapes. For the teddy target on the back I used a dinner plate and cups for the ears to make a pattern.
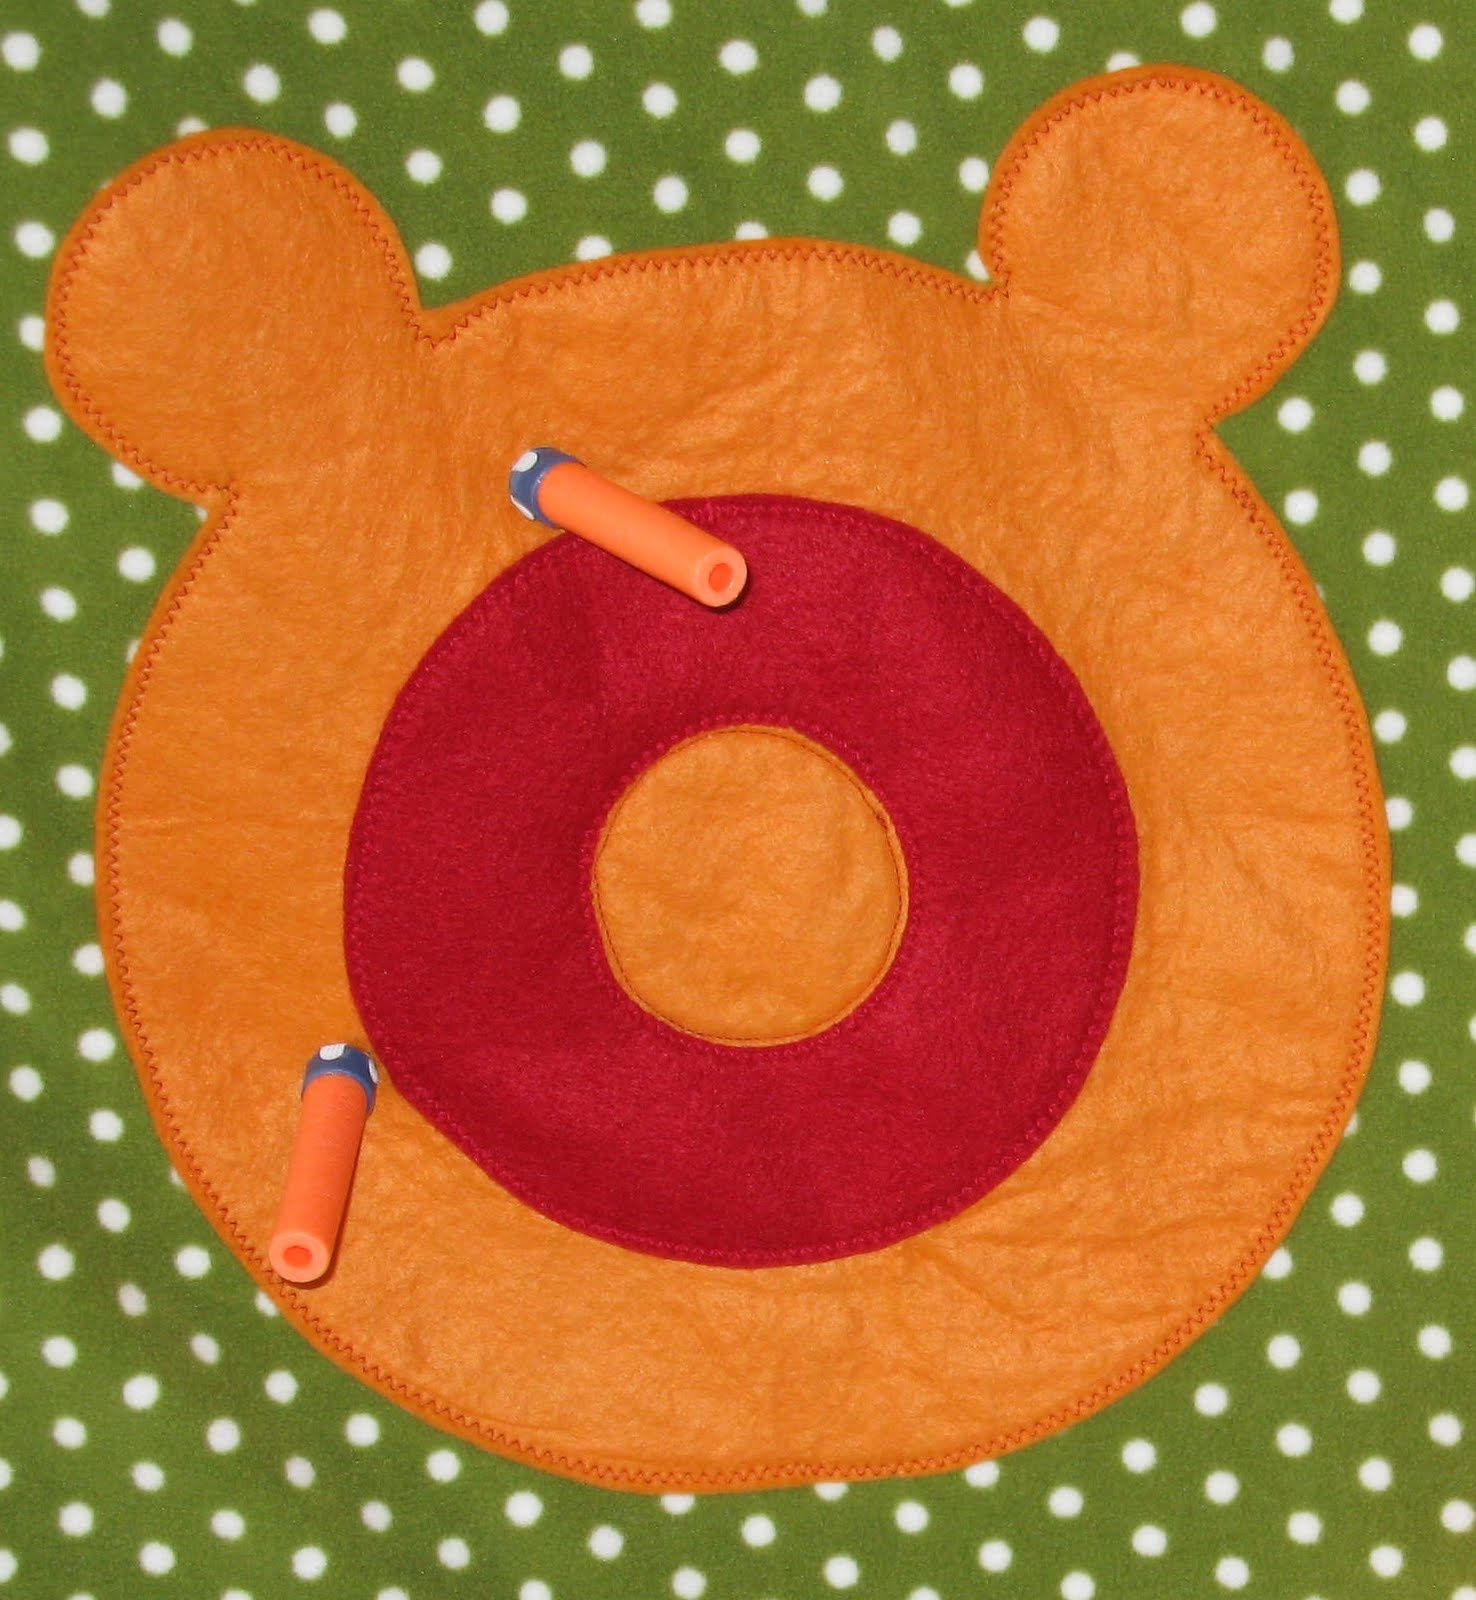
4. Sew the red target ring to the orange felt before attaching it to the blanket.
5. Applique the shapes to the blanket.
Choose a matching thread and experiment on the easiest shape first. Pin and sew one felt shape at a time to the blanket. I like to use lots of pins as the fleece is very stretchy.


Fold 66 inches of bias tape in half length wise and stitch the long open end closed. Cut 12 strips each 5.5 inches long.

7. Attach loops
Pin 4 loops to the top and bottom edge, the end loops should be about 2 inches in from the corners, and then two evenly spaced on each side. The loop is sewn to the right side of the front as shown below. Use a 1/4 seam and sew it twice to give it some strength.

Pin the front to the back with the right sides together. Ensure that the hanging loops lay flat and sew around all 4 edges, using a 1/2 inch seam allowance. Leave a 6 inch gap to allow for turning. Take care to remove all the pins as they do get lost in the fleece. Turn right side out and slip stitch the opening closed.
9. Top stitch 1 inch from the edge all the way around.
10. Attach to your neighbours fence using Velcro strips and enjoy!


What a brilliant idea!
ReplyDeleteSo brilliant!! All the details are great and very clever to have it be reversible.
ReplyDeleteWhat a fantastic idea, good work Helen! :)
ReplyDeleteHa ha what a fun project! Having girls I am hoping to escape the Nerf Gun phase but you never know! Brilliant idea x
ReplyDeleteOh no...my kids saw this and were drooling. =) I shouldn't blog hop when they're looking over my shoulder. Great idea though. Thanks for sharing.
ReplyDeleteMy grandsons would love this! Thanks for the great idea.
ReplyDeleteWhat an original idea Helen! Fantasitc!
ReplyDeleteThat's a brilliant idea Helen, my youngest just told me this morning that he HAS to get a nerf gun for his birthday so this is perfect timing.
ReplyDeleteWhat a great idea!
ReplyDeleteHelen! It's brilliant!
ReplyDeleteGenius! Brilliant idea and it looks good too :-)
ReplyDeletethat is so clever!! love!
ReplyDeleteI find that a revolting project, encouraging children to shoot at pictures of animals - not cool!
ReplyDelete