
Want to join the QAL? It's never too late. Go to the starter post here and work you way through the posts. Join the Flickr group and post your progress there even if you're making your dresden circle in 2012 or later!
Now, it's the big week. Inner circle piecing week. I'm posting this a day or two early to give you extra time to take over this step. Don't feel rushed if you're still making dresden circles though. Deep breath. here we go.
1. Place your inner circle right side up on top of your dresden (also right side up) and mark each seam line taking care not to mark beyond the seam line (I used pencil).

2. Take the top edge of the dresden, fold it over until the edge meets the top of the circle. Match the seam with the pencil mark and pin. Some people like to point their pins towards the centre of the circle but I point mine to face me as I sew.
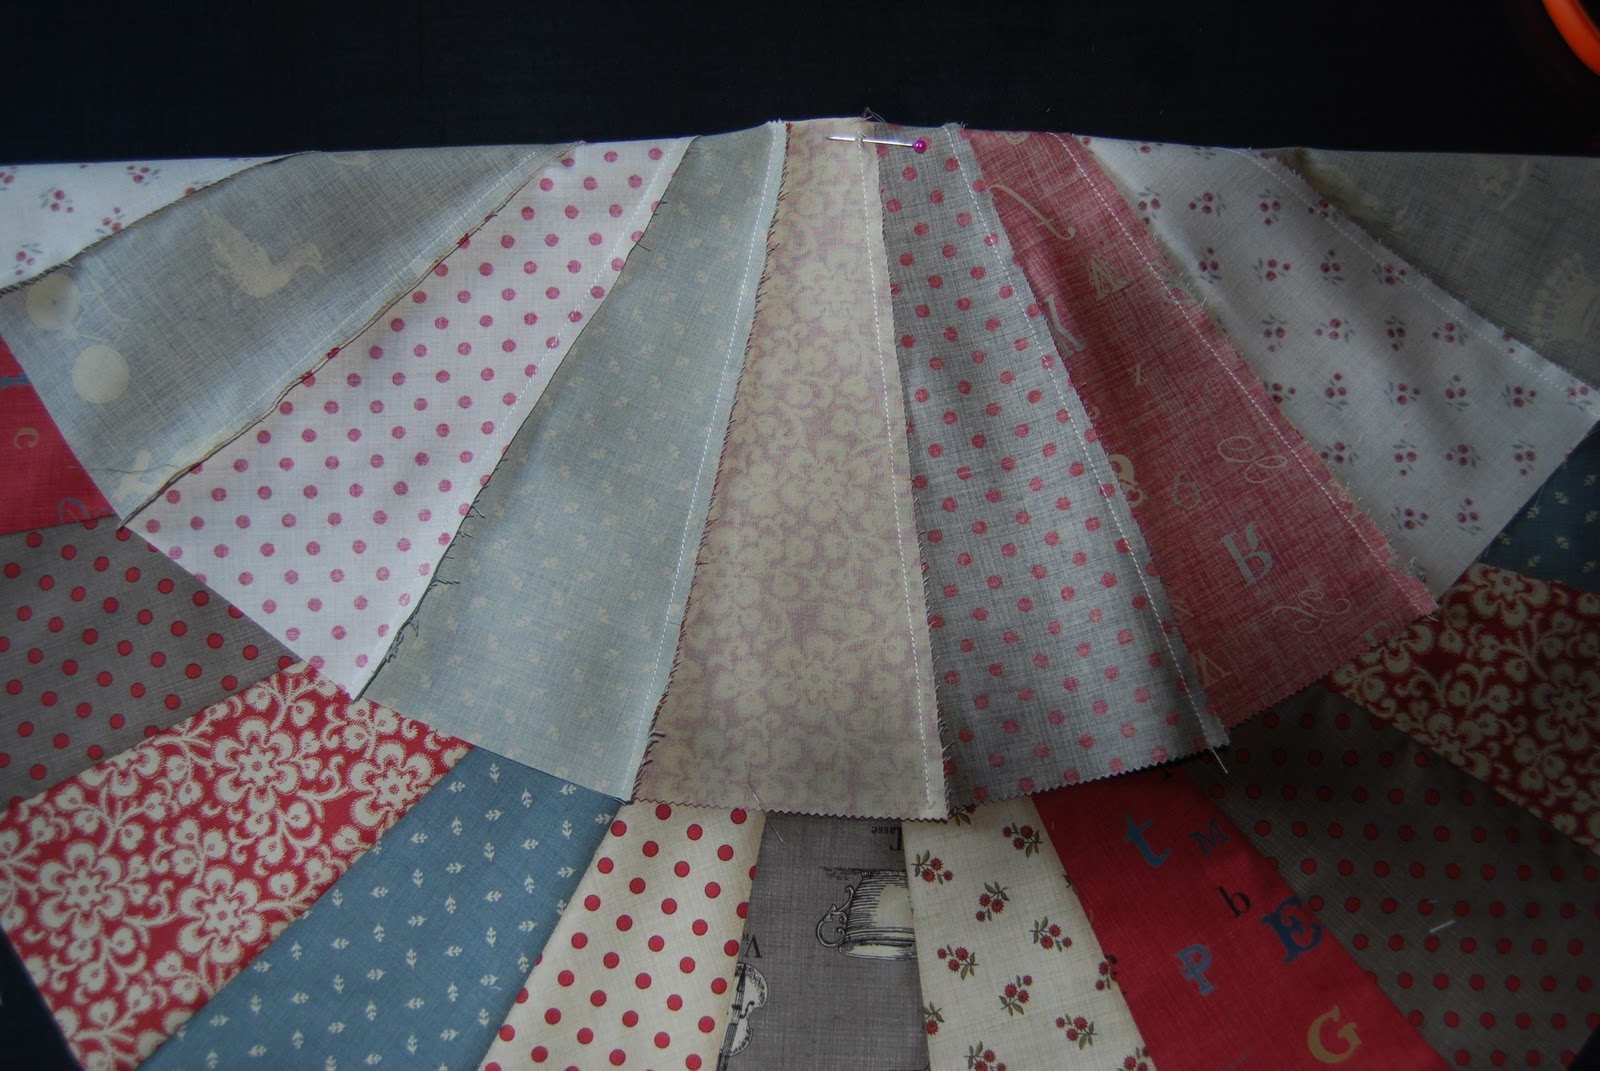
3. Pin the seam next along to the next mark on the inner circle, then the next then the next until you have pinned all 21 seams and end up with the frilly dresden on top and your inner circle underneath like this.

4. Now, shoulders down. Grab a coffee (or a glass of wine). Put the music on. Set your machine to slow if it has a speed setting. Set your machine to finish with the needle down if you have that option. And tell yourself that you are not in fact about to piece a scary circle, you are just going to sew 21 short seams. Simple as that.
5. Start inbetween two seams, jiggle the fabrics about so that the very short section you are going to sew to reach the next seam is lined up just like a normal seam. Remove the pin through the upcoming seam and sew to that seam. Just a few easy stitches. Deep breath. Shoulders down. Sip of coffee / wine / vodka whatever.

5. With the needle down in the fabric, lift the presser foot and jiggle the next run of fabric so it all lines up nicely - just until the next pin - remove that pin and slowly sew to the next seam. Keep doing this 21 times until you get back to the start.
TOP TIP: If you feel that you are ending up with more fabric flapping around on top than you have underneath, try to correct this as you go with a bit of what quilters call easing (and I call pushmepullyou). Try to stretch the circle underneath and kind of squidge without puckering the fabric on top bit by bit until you're back on track. You may need to do this a few times on your way round. Do not ignore this problem as you go or you will end up with a big bunch of spare fabric at the end.
TOP TIP: If you do get to the end of piecing your circle and you suddenly get an annoying flappety bit, just cheat. Stop sewing the circle. Take the whole dresden out of the machine. Make that one final seam between two dresden leaves a bit wider then go back in and finish your perfectly fitting circle.
6. When you have sewn the whole circle, check for puckers. Your seams may be crinkly in places and you can fix this with a good bit of ironing with steam but if you have a proper, folded pucker, unpick a couple of inches each side and re-sew easing (stretching) the fabric to get rid of the pucker. At this point, your dresden circle will look a right mess - all crinkly and pouffed up like a marshmallow in the middle. Do not worry, a hot iron full of steam will deal with it nicely.
7. Flip your dresden so it is right side down and gently press the seams towards the middle.

8. Then place the dresden right side up on the ironing board (I use a towel flat out on a table which allows me to press much better than an ironing board), set your iron to fell steam ahead and iron (I know, all you trained quilters out there are screaming at me to press, lift, press, lift). I start in the inner circle and iron outwards flattening the edges of the circle and then the leaves and pressing them hard so they flatten onto the towel-on-table in meek submission.

Voila! Your first dresden circle is pieced. The hardest part of this QAL is over. At this point it will still looks a bit flappity but piecing it into the outer circle (next week) and quilting will solve any remaining bulges. Please let me know how you got on, how pleased you were with yourselves, how you're no longer afraid of piecing circles, how much easier it was than you had thought and how glad you were you tried. And come and show me those pieced circles in the Flickr group.
And please do feel free to ask for help if you get stuck. I do not want to hear of anyone getting stuck and giving up in despair. You have a whole group of quilters of various levels of experience to help and advise you.
Oooh this looks great, Lynne, still a bit super scary, but great! Thank you ... I'm not going to start mine until next week as I'm off for a little break this weekend ... I know I will return refreshed and full of zest to get going ...
ReplyDeleteYou have done such a beautiful job showing exactly what to do. Great talent you have!
ReplyDeleteMary Ann
Don't forget about my giveaway!
Handcrafted by Mary Ann Miller's $50.00 giveaway!
I'm wishing I were doing this QAL because I'm enjoying your humor and highly technical sewing terms. :-)
ReplyDeleteOooh I better decide on my centre fabric now!!
ReplyDeletePretty scared though, I feel like I have just mastered cocking up straight lines, so it's as good a time as any to add to my repertoire!!
Don't know where I"ve been, but the last few dresdens I made I didn't even think to sew those circles on like that! I appliqued them in various sorts of ways and did not always get a nice smooth edge circle....can't believe I never thought to sew them in like that! dah. Well, I'm a sew-er on the cuff I guess and don't figure out everything right off the bat.
ReplyDeleteOh boy...yet another opportunity to embarrass myself. I wonder when I will have a chance to do this?!?!
ReplyDeleteI'm game, I hope to have time to try tonight!
ReplyDeleteThanks Lynne. If I stick with the plan I have for my dresden I get to skip this scary bit. Woohoo! I would still like to try it one day, so I will. hehe.
ReplyDeleteAlright, I'm a little behind...but am excited to get here. It's so exciting!
ReplyDeleteSo much better than hand sewing! I just started cutting wedges today. :P
ReplyDeleteLooking good lady Lynne! I like your tips
ReplyDeleteBeing the lazy girl that I am I think I'll take the appliqué road.
ReplyDeleteCan I ask your opinion? I'm auditioning different prints for my centers. Can you come take a look and let me know what you think?
ReplyDeletehttp://bijouxbaby.blogspot.com/2011/03/dresden-plates.html
I have just spent EIGHT agonizing days offline! Somehow my browsers both corrupted.
ReplyDeleteNow I'm looking at this and wondering...is there not an easier way???? Well, first of all, I need to decide what to use for the center, right? Sure is good to be back. *S*
After over a year I have finally got around to sewing the blades together. I am now basking in my cleverness at being able to make a circle of blades. Of course now I have to go and do the middle bit thingy. Curiously enough I discovered I can fit my head through the hole in the middle. If all else fails I'll try and convince everyone to make and wear them to next years retreat ;-)
ReplyDelete