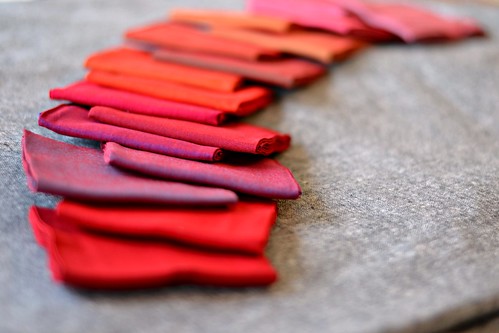
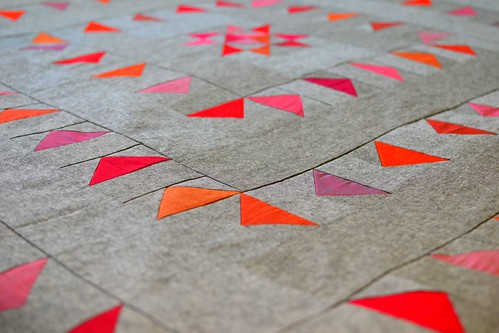
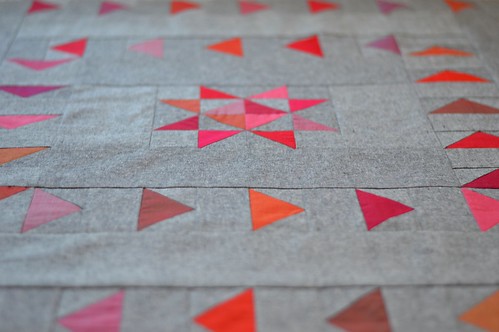
I had daydreamed about the most stripped-down and simple medallion quilt made of Oakshotts for months, and am happy to have had this opportunity handed to me -- thanks Lynne and Michael Oakshott! I settled on a design that used big quarter square triangles of the Oakshotts, so that no one vantage from which you can see the whole quilt top could have in view all of them on the straight of grain at the same time. It is very shimmery in person when it moves.
For the background fabric, I chose a grey yarn-dyed Essex linen to give some textural contrast with the very silky Oakshotts; it also looks different depending on your angle of view, but it's much coarser, and the finished top has a satisfying heaviness.
One Oakshott Rubies fat eighth bundle plus three and a half yards of 44"-wide background fabric will yield a quilt top that finishes to 64" square.
You will need to cut the following from the Oakshotts:
- 27 5-1/4" squares
- 6 2-7/8" squares
And from your background fabric:
- 114 2-7/8" squares
- 108 2-1/2" x 4-1/2" rectangles
- 4 2-1/2" squares
- 14 4-1/2" WOF strips
Note that this leaves a significant amount of the fat eighth bundle untouched. There is enough left to hoard, or to bind the quilt and piece a flashy bit to go on the back if you'd like (and I do). I did not take any pains to randomize my arrangement of the different Oakshotts throughout the quilt top -- I just laid out my units round by round as I assembled the medallion and sewed them together however pleased me. Same for the centre of the medallion; I picked my favourite six reds and cut a square to make two half-square triangle units from each of them.
The 26 5-1/4" squares of Oakshotts and 108 of the 2-7/8" squares of background fabric will yield 108 flying geese units that will measure 2-1/2" x 4-1/2", finishing to 2" x 4", using my favourite four-at-a-time flying geese piecing strategy.
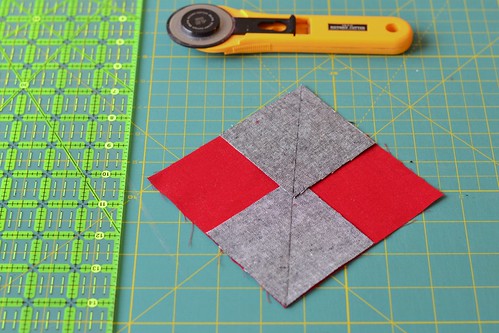
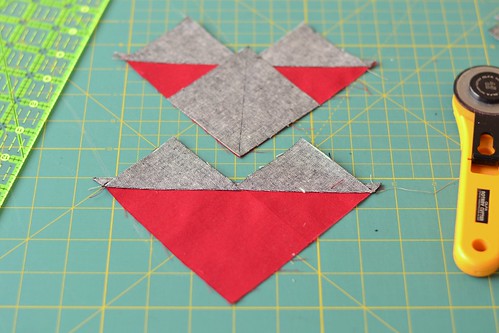
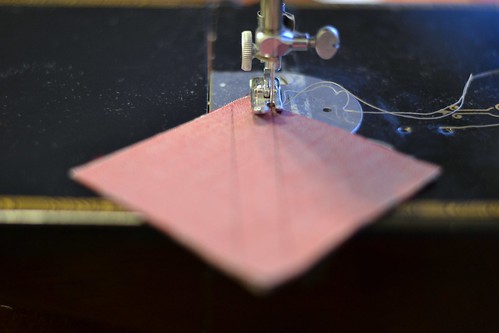
Draw a diagonal line on each of the smaller background fabric squares. Arrange two of them on a larger square as pictured, with their diagonal lines aligned; they will overlap by a bit in the middle. Sew a scant 1/4" on either side of the centre lines, then cut along the lines and press into a sort of pointy heart shape.
Arrange another square on the remaining corner of the larger Oakshott square as pictured. Sew a scant 1/4" on either side of the centre line, then cut along the line and press. Each pointy heart shape will yield two flying geese, or, four flying geese per large Oakshott square. Repeat until you have exhausted your supply of Oakshott squares and have a large pile of geese.
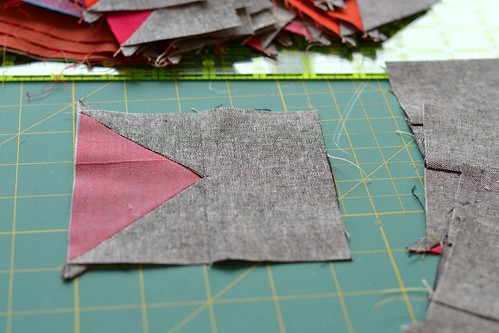
Finally, sew a 2-1/2" x 4-1/2" rectangle to each of the flying geese, so that the red arrow is pointing toward the rectangle. These are the units that will be pieced together into each patterned round of the medallion.
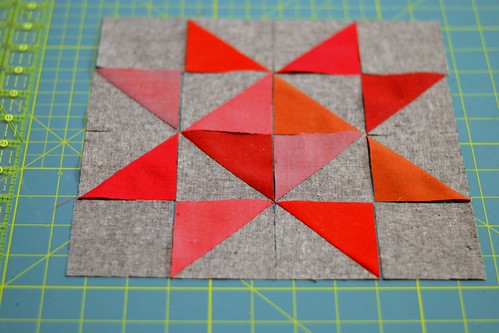
To make the block at the centre of the medallion, draw a diagonal line on each of the six 2-7/8" Oakshott squares, sandwich them right sides together with six of the same-sized squares of background fabric, and sew a scant 1/4" on each side of the diagonal line. You may also wish to draw lines 1/4" away from the diagonal and stitch along the drawn lines instead; whichever works best for you.
Cut along the lines and press to yield 12 2-1/2" half square triangle units, and arrange them as pictured below, with a 2-1/2" square of background fabric in each corner.
Sew the units together into their rows, press, then sew the rows together and press it again. The block will measure 8-1/2".
To sash the central star block, cut two 8-1/2"-long pieces off of the WOF strips of background fabric. Sew one to the top of the star block and the other to the bottom, and press. Cut two 16-1/2"-long pieces, sew to the remaining two sides, and press again. The piece now measures 16-1/2" a side.
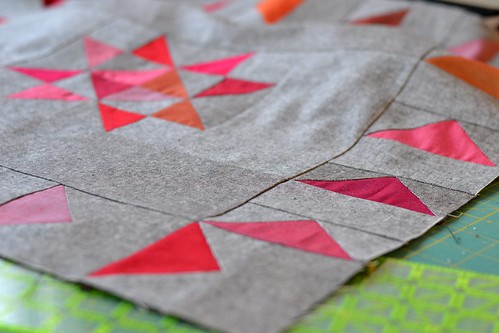
Arrange 20 of the flying-geese-plus-rectangle units around this central square in a colour order that pleases you, so that the arrows are all pointing counterclockwise and the corners make little half-windmills. Pluck out four units from the middle of the top and bottom of your arrangement, sew them together as you had arranged them, press, sew the rows of units to the top and bottom of the central square, press again....
Then sew the remaining six units from each side in the order that you had arranged them, press, sew the columns of units to the left and right sides of the central square, and press again.
Sash the central square with another round of background fabric as before -- this time you will need to cut two 24-1/2"-long pieces and two 32-1/2"-long pieces from your stock of WOF strips.
Arrange 36 of the flying-geese-plus-rectangle units around the central square, this time so that the arrows are all pointing clockwise. Sew the centre 8 units from the top and bottom of the arrangement into rows, press, sew them to the central square, and press again. Sew the remaining units into their columns, press, sew them to either side of the central square, and press again.
Then sash again, with two 40-1/2"-long pieces and two 48-1/2"-long pieces cut from the WOF strips. You will need to piece the longer pair, and all the sashing in the final round after this one -- I did not bother to line up any of the pieced-together sashing seams with any of the seams in the patchwork, but let them fall wherever they might.
The final round of flying geese will require the remaining 52 units. Arrange them so that the arrows point counterclockwise. Sew the central 12 units from the top and bottom of the arrangement around the square into rows, press, sew them to the central square, and press again. Sew the remaining units into columns as before, press, and sew them to either side of the central square.
Sash one more time, with two 56-1/2"-long pieces then two 64-1/2"-long pieces assembled from the WOF strips, and you're done!
Back, quilt, and bind as you wish. I have big plans for some variegated orange Aurifil 50wt thread and quilting in a wobbly spiral; I think the medallion resembles a (rather stylized) fire pit with Oakshott sparks leaping out of the Essex charcoal, and more orange will warm it up. I have ample Oakshotts left over to piece into a variously red binding and a couple more starry blocks to insert into the backing.


Great combo, I can see the Rubies shimmer!
ReplyDeleteBeautiful quilt
Thank you! It's so hard to convey how shimmery they really are when they move, it's unbelievable.
DeleteFabulous, this is so striking!
ReplyDeleteThanks!!
Deletewonderful :-)
ReplyDeleteThank you!!
DeleteThis is a great quilt, maybe Rebecca will bring it over for me to see in person. Nice tutorial too!
ReplyDeleteMaybe so! This is an awful lot of flying geese, they need more in-person admirers.
DeleteLovely bits of ruby.
ReplyDeleteYour color choices are amazing! Love the sunset colors. Will be a true beauty.
ReplyDeleteSo effective, love it :)
ReplyDeleteIt think it's gorgeous - thank you for showing me how to make the most of these gorgeous fabrics without having to buy too many. They are beautifully showcased, and the tutorial is excellent.
ReplyDeleteEffective tutorial and stunning way to showcase these gorgeous fabrics
ReplyDeleteThis is lovely, the linen sets off the ruby colours of the Oakshott beautifully!
ReplyDeleteYou hardly have to do anything to the Oakshotts to show them off -- they take care of it all on their own!
ReplyDeleteOh wow, what a gorgeous quilt
ReplyDelete