
It's so fun to be writing a tutorial for Lily's Quilts and Abakhan Fabrics today! Thanks for having me! I'm Jodi, I blog over at Tickle & Hide, and I live in Newcastle, Australia.
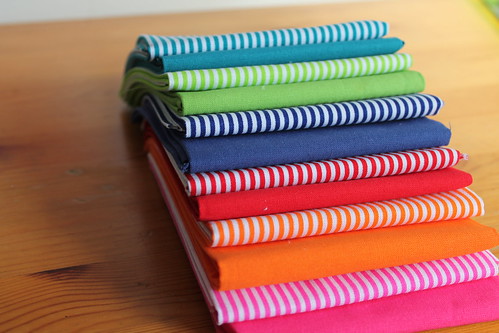
For my tutorial, I chose to make a baby's fabric book from two fat quarter bundles, a Bright Stripes bundle and a Plain Brights one.
I decided to make quilted pages with binding. There are quicker ways to make fabric books, but the stripes and solids together are so striking, I thought it would be more fun with a border for each page.
Firstly I pulled out all the stripey prints and two of the solids. Fat quarters are 18"x22" and I cut 10" off each long end so I had rectangles of 10"x18". I used the stripey backgrounds for the pages, and the solids for the cover.
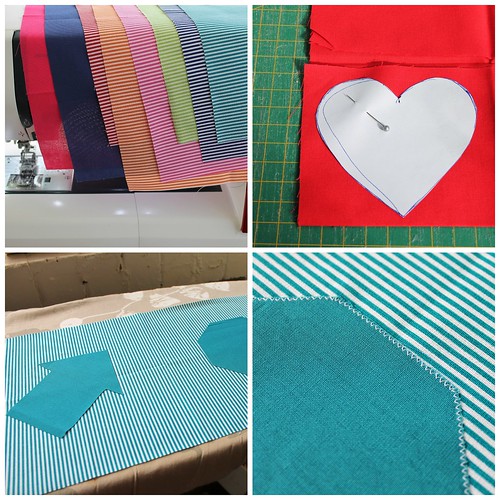
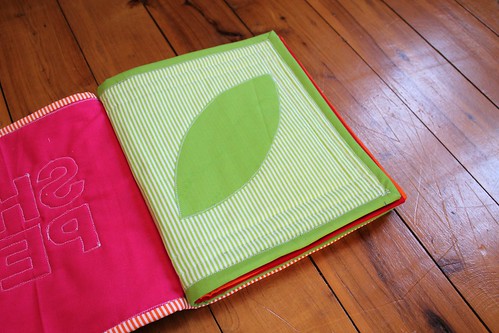
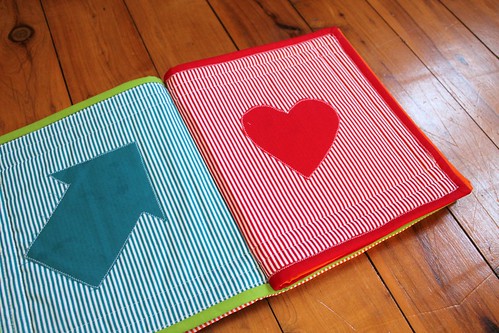
I decided to go with the theme of shapes and using some prints outs I found online, some free hand stencilling, and the lines and angles on my ruler, I cut out two shapes in each solid to co-ordinate with the stripey background. You'll need 12 shapes in all. I only had a little bit of iron on transfer paper left, so I cut small pieces, ironed them to the back, peeled the paper off and pressed them to the background.
I then used a small zig-zag stitch to appliqué the shapes to the stripes.
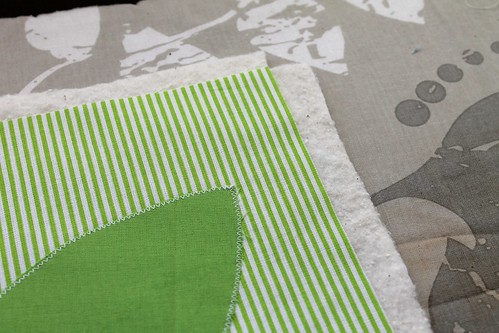

I love projects that use up my scrap wadding! I used 505 spray baste to fix my pages to scrap cotton wadding. Once the 'front' side is stuck on, make a little cut in the corners so you know where to place the 'back'. (I thought of this trick after I did the first one!) I put colours back to back, that I liked together so that the binding I chose matched both. Now you should have 3 'mini quilts'. (I waited till the end to make the cover out of the solids.)

Quilt around the outside of the shapes. I quilted two lines, starting an inch from the edge, and an inch apart. Then trim the excess wadding around the edges.
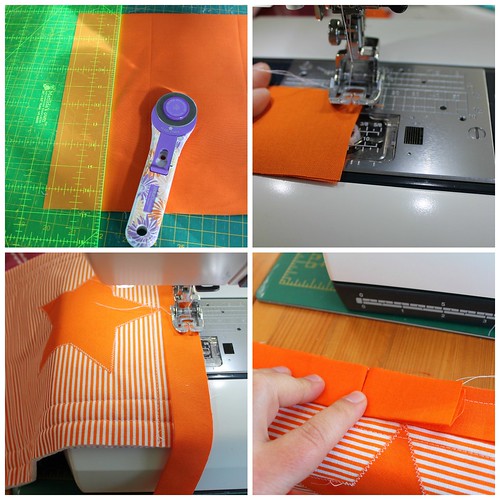
I made the binding from the solid colours, matching them with one side of the pages. From the longest edge of the left over fabric, I folded it in half and cut 3 x 2 1/4" strips. These lengths are just enough to make it around the page, so I sewed them together end to end, pressed the seams open, and then pressed those long lengths in half make my binding.
With the fold facing the page, sew the binding to the page with a 1/4" seam allowance. When you get to the other end, press the meeting binding together with your fingers, open out the binding and sew the two ends together on the folds. Trim the excess, then finish off attaching the binding to the page. If you're new to binding, these photos and instructions probably won't be enough. There are lots of tutorials online which show more steps.
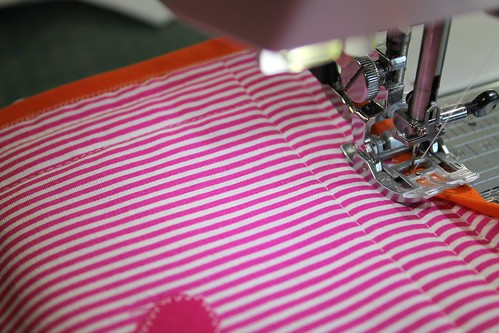

Fold the binding over and sew with your favourite method. I used a zig-zag stitch following this tutorial from Stitched in Color. It's quick and forgiving!
Now for the book cover!
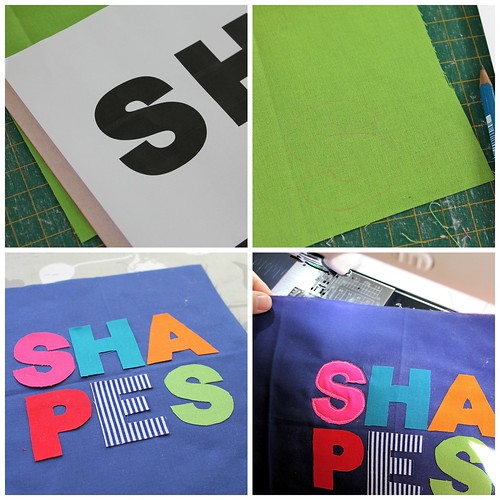
I typed out the word SHAPES on my computer using a bold, sans print, and enlarged in to about 200. Then I printed it out.
Using transfer paper facing the colour, in betweenthe fabric and print out, trace around the outside of the letter with a pencil, and cut the letter out. I used the same method as above for fixing the letters to the background. You could trace the letters onto iron-on transfer first, then cut it out once you've pressed it onto the fabric.
Arrange your letters on the page.
I decided the quickest and easiest way to applique the letters on was to use my free motion quilting foot. And I always get better tension with more layers, so I made my quilt sandwich first with more scrap wadding and the last solid rectangle, the 'sketch stitched' around the outside of the letters.
Trim the excess again and bind as above. I used a stripey print this time for the binding.

With all four mini quilt pages completed, you can now sew them all together! All those binding layers were definitely too thick to sew over, so starting as close as I could to the edge, and using my walking foot, I used a wide zig-zag stitch down the middle of the pages and back up again to make sure it was fixed securely.
And you're done! Please feel free to ask any questions and I'll check back to answer them in the comments. Thanks for having me Lynne!
~Jodi. x
Great baby book Jodi! And do I spot an apple leaf in there?
ReplyDeleteThank you! Haha! Yes! I was getting desperate! Thinking up 12 shapes is hard!! :)
DeleteSuper cute! I spotted the same as Nicky ;)
ReplyDeleteSo cute. Thank you.
ReplyDeleteSuper cute! I love the stripes.
ReplyDeleteGreat idea! I love these fabrics, as stripes are my favorite! Thanks for this tutorial--very well written. I'm certain to use it in the future to make a child's book.
ReplyDeleteFun idea :o)
ReplyDeleteBrilliant as always, Jodi!!
ReplyDelete