
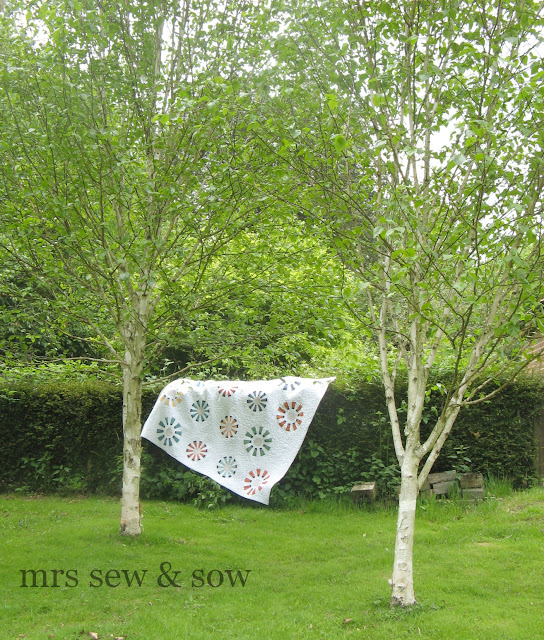
Hi I'm Nicky from Mrs Sew and Sow and I am working my way through a long list of UFOs. My last two finishes used plaid fabric, so when Lynne announced her Made with Oakshott feature in January, (yes shock horror it was that long ago) asking for ideas to use the beautifully and subtly striped Longshott fabric it seemed too good to be true as I was already in the stripey zone. I threw my UFO list aside and jumped at the chance. Thank you Lynne for giving me the opportunity to follow through an idea inspired by this beautiful quilt of Dresdens shown here with the kind permission of Cindy Lammon of hyacinthquiltdesigns.

Cindy's quilt was made with spotty fabrics, navy and white but I wanted to make a feature of the Longshott stripes by using them both vertically and horizontally in the fan blades. My thanks to Michael Oakshott, for sending me the gorgeous selection of Longshott fabrics. So here is my version:

So how to make a quilt like this?
The fabric requirements are as follows:


And here is the back! I am a bit of a fan of pieced backs and thought I would try out a different way of using the Longshott fabrics and a bit of improv seemed a fun way to go! Those diagonal strips go the width of my rows and I sneaked one more Dresden in on the back!

So how to make a quilt like this?
The fabric requirements are as follows:
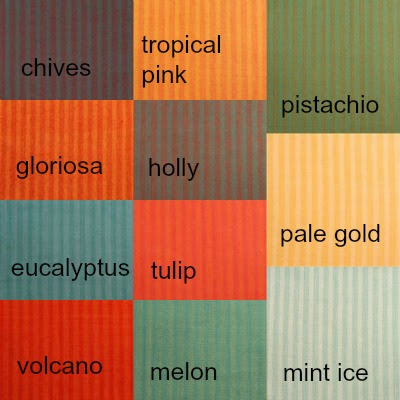
- 10 x Oakshott Longshott FQs of your choice - here are mine!

I loved to contrast the hot orange/yellow colours with the cooler blue/green colours. I used the hot colours stripes horizontally across the Dresden blades, and the cooler colours stripes went vertically up the blades.
Instructions
Part One - Cutting out
I drew on Cindy's excellent tutorial which can be found here for forming the Dresdens. All the way up to trimming them into octagons. I decided to keep mine as circles - partly because I wanted the challenge of setting in a circle but also because you would need a 15 degree ruler to form octagons and my Dresden ruler wasn't.
As the Longshott fabric came to me as Fat Quarters not yardage I had to cut three strips of Longshott fabric to get the 10 pieced Dresden blades I needed to complete my circles. Cindy made her pieced strips from yardage and managed to cut them out of one Width of Fabric pieced strip.
My white background and my navy fabric was yardage and I cut my strips width of fabric like Cindy. Though my Dresden being wider meant I cut 20 blades in total rather than Cindy's 24. Each strip cut makes enough for two Dresdens - one small one with the background fabric to the outside edge and one large one with the background fabric in the centre.
Part 2 - Stitching the Dresdens
Part three - Inset the Dresdens
Next I used this tutorial from my lovely hostess with the mostest Lynne, to set the Dresden in a square piecing-outer-circle. I cut my white background fabric into strips 18.5" x width of fabric which gave me enough to inset two Dresdens.
Part four - Stitching rows together
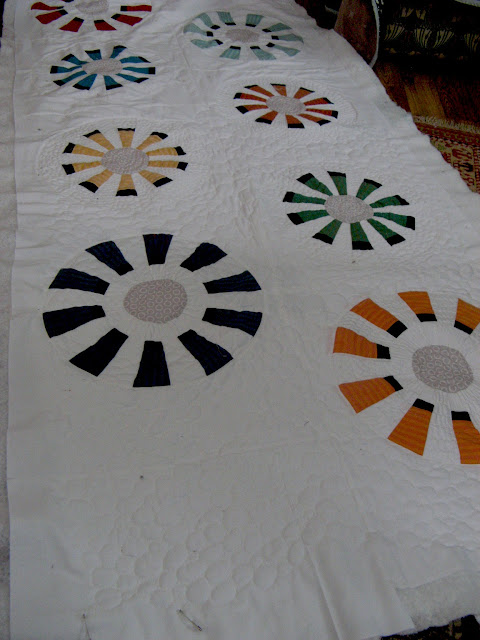
Once the circles were set in I trimmed the blocks to 18.5" and sewed them in rows of four - alternating the colours. As you can see from Cindy's tutorial you get a large and a small Dresden from each colour strip set. Next as I wanted more movement than a grid pattern I staggered the rows so that the Dresdens were halfway between the next row. I made five rows of 4 Dresdens.

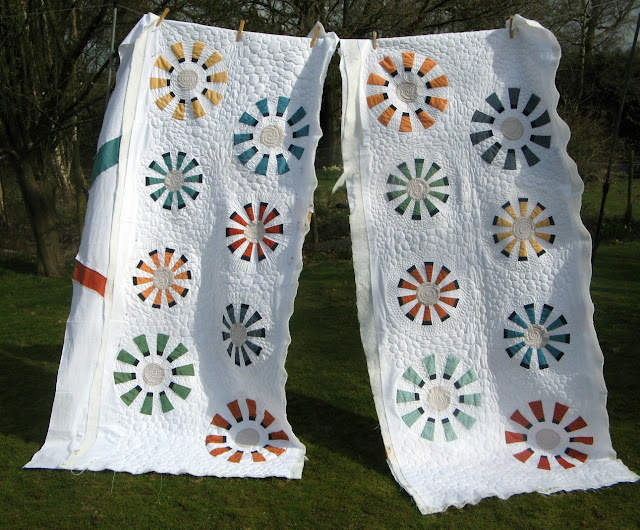
I added a strip 9.5" x 18" to the alternate top/bottom end of my rows as required to complete them. You can see this in the above photo. As this is the biggest quilt I have made (90"x 90") I decided to quilt this as you go. I joined two rows together - in three layers - my top, the wadding and the back (which I pieced) and quilted. I did this twice. Here are my 2 two row panels:
I joined a single row to the side of one of these panels (again all three layers) making a panel of three rows and quilted the extra row and over the join. Then joined the two row and three row panel, and quilted that join. A bit laborious with all the joins but I managed to quilt it with lots of detail on my domestic machine.
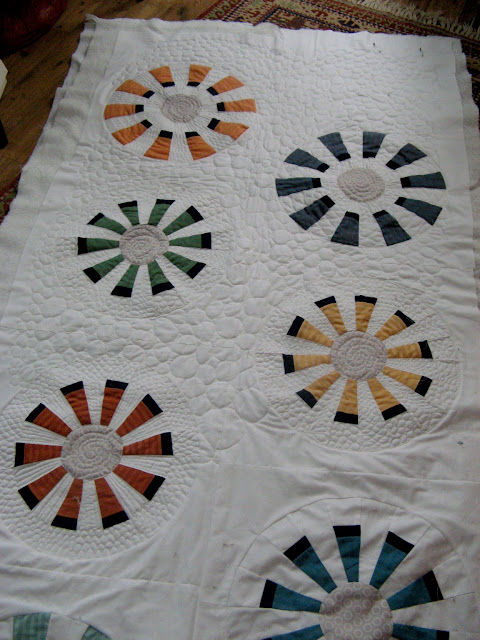
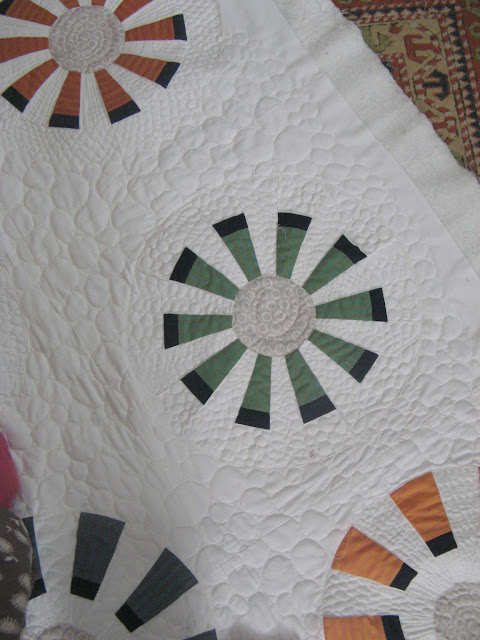
The grey centre is quilted with a swirl and the white negative space between Dresdens is completely covered in bubble quilting. Each Dresden is only quilted on the white blades - with two exceptions. This makes the Longshott stand out. And each Dresden has a slightly different pattern on it. Eventually I bound and finished it and am calling it 'Not by a Longshott'. I hope you enjoyed my tutorial, and if you have any questions please post them on my blog or in the comments to this post and I will try to answer them.
- 6 yards of Kona white to inset blocks and a further 2 yards for the Dresden blades.
- Half a yard of Kona Navy - though you might just want a little bit more.
- Half a yard of grey print fabric for centre circles and 1 yard of grey print for binding
- Backing fabric - I pieced my backing fabric from leftover Longshott, a few bits of Kona Navy and lots more White fabric
- Wadding/batting of your choice
Instructions
Part One - Cutting out
I drew on Cindy's excellent tutorial which can be found here for forming the Dresdens. All the way up to trimming them into octagons. I decided to keep mine as circles - partly because I wanted the challenge of setting in a circle but also because you would need a 15 degree ruler to form octagons and my Dresden ruler wasn't.
My pieced strip was cut as follows: white 2 1/2", navy 1 1/4", Longshott 3 3/4".
As the Longshott fabric came to me as Fat Quarters not yardage I had to cut three strips of Longshott fabric to get the 10 pieced Dresden blades I needed to complete my circles. Cindy made her pieced strips from yardage and managed to cut them out of one Width of Fabric pieced strip.
My white background and my navy fabric was yardage and I cut my strips width of fabric like Cindy. Though my Dresden being wider meant I cut 20 blades in total rather than Cindy's 24. Each strip cut makes enough for two Dresdens - one small one with the background fabric to the outside edge and one large one with the background fabric in the centre.
Part 2 - Stitching the Dresdens
I joined my blades in a circle, alternating the pieced blades and the solid white blades. Here are all 20 of them.
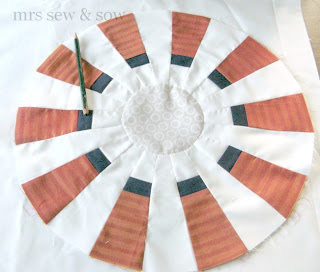
As my Dresdens are circles I kept to a circle as the centre of my block. The Dresdens are 16" in diameter unfinished, the centre hole is 3" in diameter so to make sure I had plenty of overlap I made my finished centre circle size 4.25" in diameter.
I cut freezer paper the size I wanted the final circle to be (4.25") and cut my fabric half an inch bigger all the way around (5.25"). Please note your circles may be a different size if you are using a different sized Dresden Ruler.
I ironed the freezer paper to the middle of the circle and then basted all the way around the outside edge of the circle with enough thread to leave long ends. I used those to pull the fabric up around the edge of the freezer paper so it fitted snugly then tied them. I then pressed my circle ensuring the edge was nice and smooth.
Then I hand stitched each circle to the middle of my Dresden circle pinning it at opposite sides to ensure a central position - otherwise you can end up with your Centre circle not covering the hole. Alternatively you can machine applique your centre circle to your Dresden.
Part three - Inset the Dresdens
Next I used this tutorial from my lovely hostess with the mostest Lynne, to set the Dresden in a square piecing-outer-circle. I cut my white background fabric into strips 18.5" x width of fabric which gave me enough to inset two Dresdens.
Part four - Stitching rows together
Once the circles were set in I trimmed the blocks to 18.5" and sewed them in rows of four - alternating the colours. As you can see from Cindy's tutorial you get a large and a small Dresden from each colour strip set. Next as I wanted more movement than a grid pattern I staggered the rows so that the Dresdens were halfway between the next row. I made five rows of 4 Dresdens.

I added a strip 9.5" x 18" to the alternate top/bottom end of my rows as required to complete them. You can see this in the above photo. As this is the biggest quilt I have made (90"x 90") I decided to quilt this as you go. I joined two rows together - in three layers - my top, the wadding and the back (which I pieced) and quilted. I did this twice. Here are my 2 two row panels:

I joined a single row to the side of one of these panels (again all three layers) making a panel of three rows and quilted the extra row and over the join. Then joined the two row and three row panel, and quilted that join. A bit laborious with all the joins but I managed to quilt it with lots of detail on my domestic machine.


The grey centre is quilted with a swirl and the white negative space between Dresdens is completely covered in bubble quilting. Each Dresden is only quilted on the white blades - with two exceptions. This makes the Longshott stand out. And each Dresden has a slightly different pattern on it. Eventually I bound and finished it and am calling it 'Not by a Longshott'. I hope you enjoyed my tutorial, and if you have any questions please post them on my blog or in the comments to this post and I will try to answer them.
wow - that's beautiful!
ReplyDeleteFabulous Nicky!
ReplyDeleteFabulous!
ReplyDeleteBeautiful Nicky...and loving to see that FMQ being used. I have never quilted in parts before but it made it look a lot easier than quilting all together...maybe this is how I am going to get the Swoon finally finished. Looks beautiful....is it just for you?
ReplyDeleteWOWZA love the way you quilted in Panels, but I have to confess, that I didn´t get it totally how you put them together, but I will ask you via mail some day ;-)
ReplyDeleteoooh fab quilt and quilting
ReplyDeleteGorgeous - great use of the oakshott! Quilting is fab!
ReplyDeleteFantastic Nicky, I have done some of my quilting like that in big quilts. It all looks great.
ReplyDeleteStunning!
ReplyDeletedid you take photos of how you join them?
ReplyDeleteNicky this is a stonker! I love Oakshotts and these Longshotts are perfect for your modern Dresdens. I am going to have to pick your brains about your QAYG - I have read lots of tutorials and I *think* I get it but I would like to make sure before I try it myself! Beautiful - hope I get to see the real thing x
ReplyDeleteWhat a lovely treat for the eyes! Thanks for sharing a wonderful tute! You have wowed us with the quilt and the photography!
ReplyDeleteThat's gorgeous. Nicely done.
ReplyDeleteI've never thought of quilting in two strip and THEN piecing it together and finishing it off... What a great idea to avoid so much bulk for the majority of it!
ReplyDeleteBeautiful. Thanks for sharing.
ReplyDeleteThis is a seriously gorgeous and ambitious quilt. I love everything about it
ReplyDeleteThe quilt is exquisite.....It would be wonderful if you showed what type of join you used.
ReplyDeleteWhat a beautiful quilt- congratulations! What a clever technique to piece in sections, it worked brilliantly. Lovely quilting too.
ReplyDeleteAw such amazing work. I would never have thought of the 2 piece thing. The project is lovely from fabric to finish.
ReplyDeletethis is really lovely!
ReplyDeleteAh, that Nicky, she's a clever lady! Beautiful quilt, reminds me I must get my green dresdens finished, lets aim for the end of the year on that one!
ReplyDeleteIt's absolutely stunning! Wow!
ReplyDeleteLovely work there Nicky xxx
ReplyDeleteWhat a striking quilt! And the quilting, wow.
ReplyDeleteAmazing quilt and the quilting is fab. Di x
ReplyDeleteIt's amazing Nicky, and so much FMQing - it looks gorgeous. Love it!!!
ReplyDeleteCall me contrary but I prefer the design on the back. I don't think you need patterns you have a lovely design eye. Well done!
ReplyDeleteFabulous! Your quilting is amazing!
ReplyDeleteOh my goodness!! How wonderful it looks. Very nice job!
ReplyDeleteWhat a beautiful quilt, I love the quilting and the fabrics.
ReplyDeleteVery clever! I had contemplated quilting my recent large quit in a similar manner but ended up quilting the distinct centre panel by hand and using the machine for the large setting corners. You have done a magnificent job of your quilting and the entire quilt design is very effective.
ReplyDeleteI love both the piecing and the quilting. What a beautiful quilt!
ReplyDeleteSo beautiful gives me hope to finish my tutorial!
ReplyDeleteWhat a stunning quilt!!
ReplyDeletewow, gorgeous Nicky! I love all the ways you can use the dresden plate and make a totally different quilteach time. Awesome quilting too, well done!
ReplyDeleteWow I would never have guessed it was quilt as you go!
ReplyDeleteReminds me of your fruity polo quilt.
I need to take my quilts on walks so I can take beautiful pics like yours!
Amazing Nicky
ReplyDeleteBeautiful and thanks for sharing your process. A well deserved winner!
ReplyDeleteGorgeous quilt. Love the heavily quilted look. Well done
ReplyDelete