
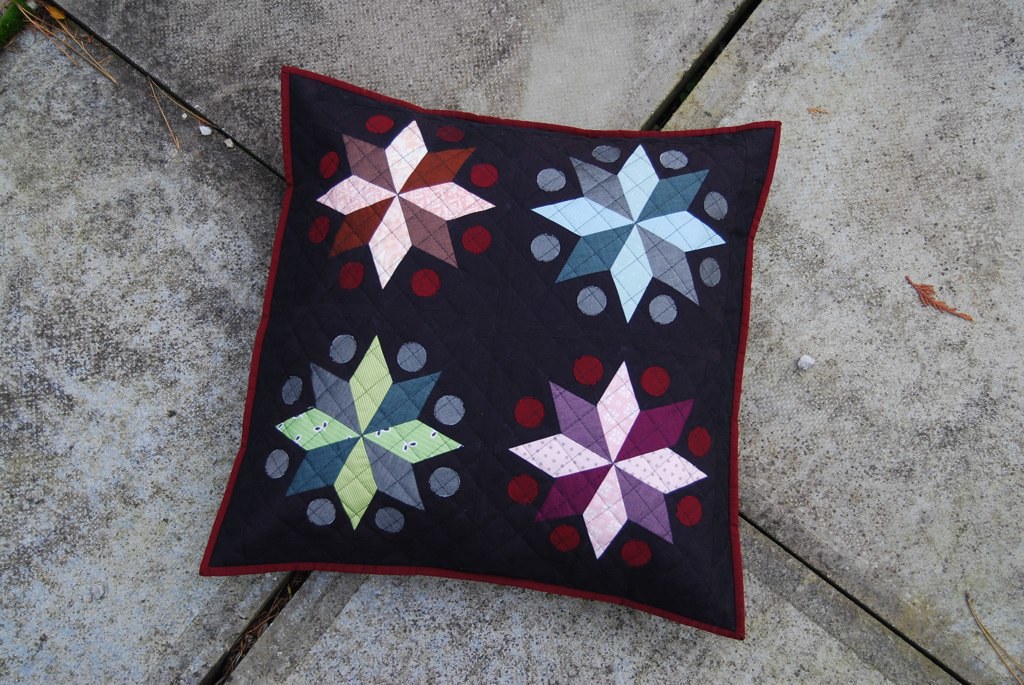
So I am day five on the Sizzix Blog Hop. I made this pillow a couple of weeks ago as my parents' Christmas "card" (don't ask) and the tutorial to make this pillow is my stop on the blog hop.

For more information about the Sizzix patchwork and quilting range, click here. And here are the stops before and after me in this blog hop:
Monday 19th November - Angela Southey
Tuesday 20th November - Tacha Bruecher/Fat Quarterly
Wednesday 21st November - Katy Jones
Thursday 22nd November - Hadley Gordon
Friday 23rd November - Moi
Saturday 24th November - Lory Bucaria
To be in with a chance of winning a Big Shot machine and a selection of our quilting dies worth over £130, click here! Closing date: Wednesday 28th November 2012 at 10am GMT.

Fabric requirements:
- Various scraps for the stars and circles (32 scraps min 2 1/2" x 4 1/2" and 32 min 1 1/2" square).
- Approx 3/4yd background fabric for paper piecing and sashing. Before paper piecing, cut one 1" WOF strip and two 1 1/2" WOF strips for sashing the pillow.
- Wadding for the pillow front 22" x 22".
- Fusible web for attaching the baubles.
- You will also need additional fabric / wadding / zip to finish the pillow back as desired.

3. Foundation paper piece four of template A and four of template B. Note that there is a 1/4" seam allowance but a 1/2" allowance around the outside of the finished block, so the block will measure 9" square once pieced.
4. Piece one star by first sewing the templates A and B into pairs.

5. Then sew two of those into pairs.


9. Cut the 1 1/2" WOF strips into two lengths of 18" and two lengths of 20". Sew the two 18" lengths to the top and bottom of the pillow top.

10. Sew the two 20" lengths to the two sides of the pillow top.

11. Following manufacturer's instructions, fuse fusible web to the back of the fabric scraps being used for the baubles. Cut thirty-two 1" circles using the Sizzix 1" circles die and fuse to the pillow front.
12. Finish the pillow as desired.
Thanks for the tute Lynne - it's on the to do list!
ReplyDeleteStunning cushion. Di x
ReplyDeleteThanks for the tutorial. A gorgeous design
ReplyDeleteYes will have to give this a try and one of them there cutters would be jolly useful...
ReplyDeleteThe Xmas card competition has got serious!
Thanks for the tutorial and pattern. I don't have a sizzix but think I can paper piece these.
ReplyDeleteI think you explained once about the Christmas card competition once ~ I love yours!
Wonderful cushion and tutorial - thank you!
ReplyDeleteYour cushion is lovely. Thank you for the tutorial :)
ReplyDeleteThis cushion is just fabulous. And yes, I have dropped the US term pillow and adopted your UK term cushion...
ReplyDeleteSuper duper paper pieces printed - ta muchly x
ReplyDeleteThis is just gorgeous, Lynne!
ReplyDeletegreat tute!
ReplyDeleteI'm already a follower!
ReplyDeleteI posted your tutorial link to FaceBook! Look under Alicia Key!
ReplyDeletethis is beautiful
ReplyDeleteLoooove it idea and all you projest!! nice job!!
ReplyDeleteby paLLina
Very cool, how's the 'card' war going this year? :oD
ReplyDelete