
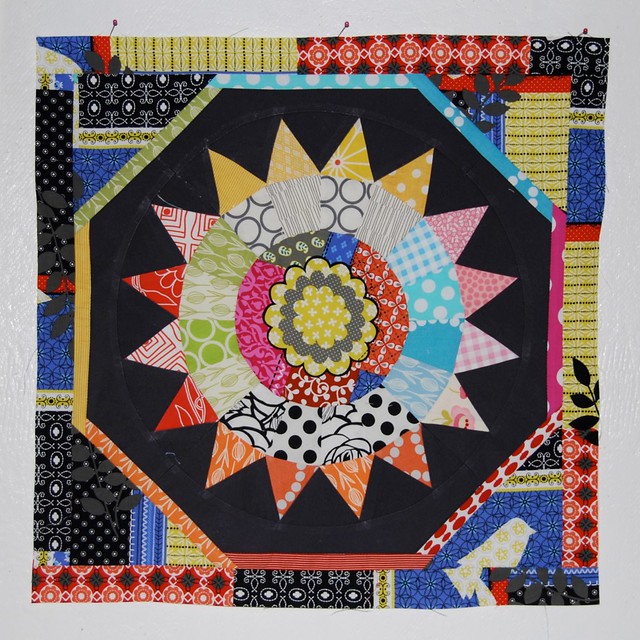
So the final step is to join the four section together and piece the centre circle. After that, I cut mine into an octagon, skinny sashed, added triangles and more sashing to make it square again and am going to quilt and bind it and hang it on my kitchen wall. I'll leave you to decide how to finish yours because I like seeing the different ideas people come up with.
1. Now the trick to getting something like this looking good is to match the point where the bottoms of the triangles meet on each segment so I start my seam right there. Put a pin through that exact spot on the two pieces you are joining - vertically right down through the fabric so one point is sitting bang on top of the other. You can just about see the pink pinhead in this photo.

2. Carry these two pieces with the pin in place over to your machine, place under the needle, slide the pin out and lower the needle into that exact spot.

3. Sew from there to the end of the seam. Then flip the whole thing over and sew the other end of the seam starting from the same junction taking care to pin at the point where the seams meet so your circle joins properly.

4. Repeat until you have all four sections sewn together. Flip and press these seams anti-clockwise.
5. Now measure the diameter across your inner circle. Add 1" to this measurement. You now need to take your compass and draw a circle with that diameter. This means you need to set the distance between the point of the compass and the pencil at half that number. For example, if your inner circle diameter is 6", your new fabric circle will need to have a diameter of 7" and a radius of 3 1/2". I draw mine onto freezer paper which can then be ironed to the fabric and makes cutting out that circle very easy.
6. You are now going to piece the inner circle in the exact same way as you pieced the inner circle for the dresden QAL. If you did not make this, the post is here and will take you through piecing this circle step by step.
And here is my finished BLG (oooh sounds like a sandwich). Now use your imagination to add something to your Big Little George. A Flying Geese surround? A sawtooth border? Some skinny sashing? Cut it into a circle and piece that into something else? Turn it into a wall hanging? A pillow? I can't wait to see what comes along in the group photostream.
And here is my finished BLG (oooh sounds like a sandwich). Now use your imagination to add something to your Big Little George. A Flying Geese surround? A sawtooth border? Some skinny sashing? Cut it into a circle and piece that into something else? Turn it into a wall hanging? A pillow? I can't wait to see what comes along in the group photostream.
Love the way your block has evolved - can't believe there has been talk about dumbing down and can't believe how long you have been at this game, you are a natural.
ReplyDeleteWow. I just love how your block turned out.
ReplyDeleteWell, yours certainly is stunning. After several hours of intense work, uh fun, I finally got finished with this particular part. All I have to say is thank the Good Lord for the person who invented the seam ripper.
ReplyDeleteI'm exhausting my stash to find the right fabric for my center. Maybe with fresh eyes today, I'll find the right fabric. This block was so much fun to make and not as challenging as I thought it would be. Your instructions were great.
ReplyDeletethis block design is amazing. i want to make it, but it just entered the sewing project queue. unfortunately, that means it might be September before it get to it...
ReplyDeleteI just found your blog and love it! I love the colors you use, very nice!
ReplyDelete