
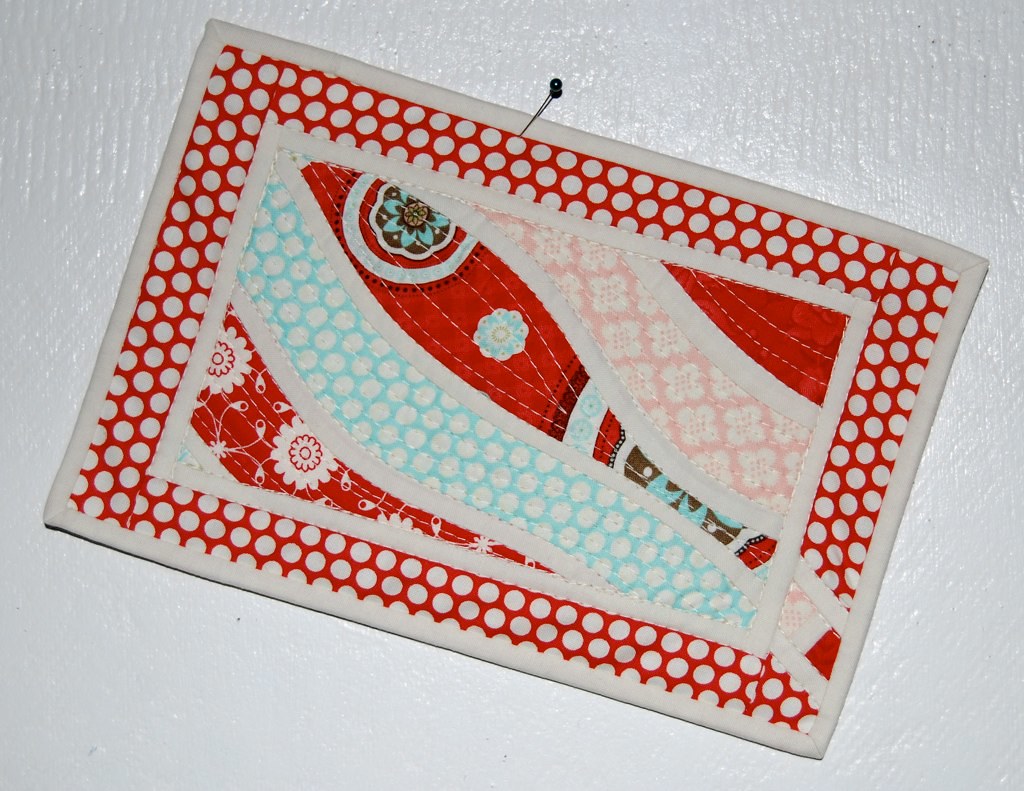
In the calm before the storm of piecing the inner circles of your dresdens, let's have a little play with curved seams. Grab a couple of squares of fabric (I used a couple of layer cake squares), some strips of a solid and have a little play with this. Don't worry about planning what you're going to make, just have fun with the process, play around with a few scraps of fabric and see what you end up with. If you like what you've made, you could make yourself a little mug rug from it like this one.
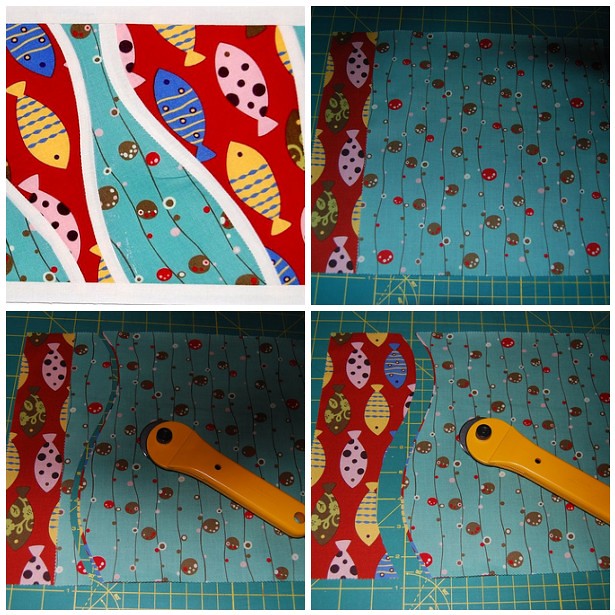
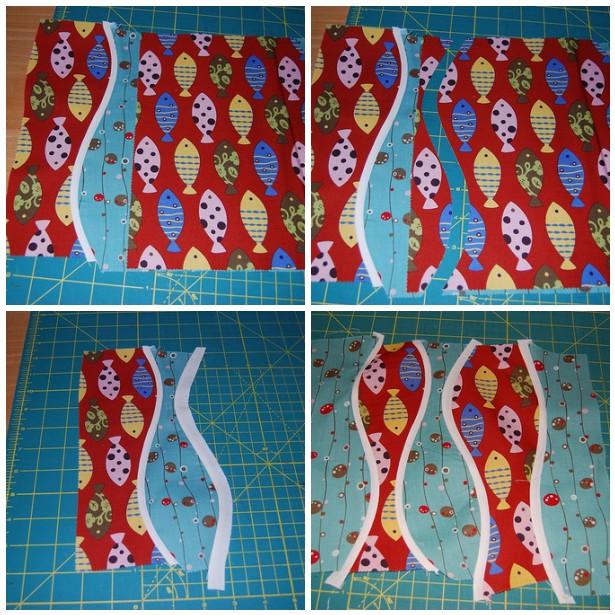
1. Grab 2 fabrics. Mine were ten inches long (layer cake slices) but, by the time you've finished, they'll be shorter than that in the block so add a couple of inches to the final size you're looking for. Lay one on top of the other, both with their right sides up, one slightly to the left and one slightly to the right. Cut an S shape through both fabrics with your rotary cutter. The first photo in the mosaic below is the finished fishy piecing just so you can see where I was heading in my mind as I went along.
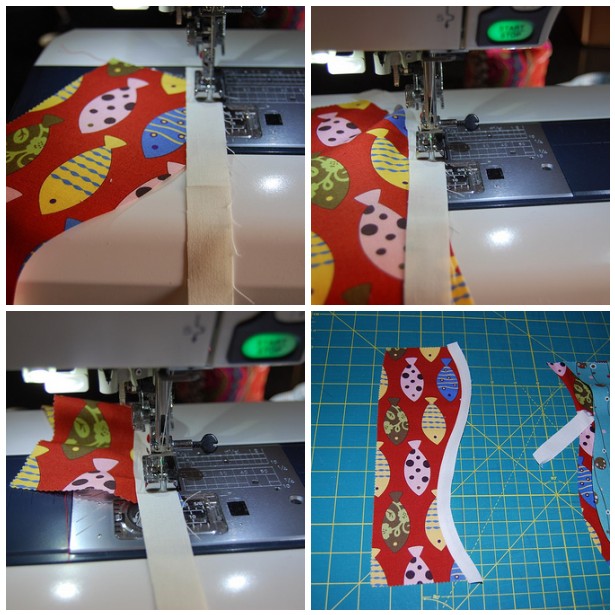
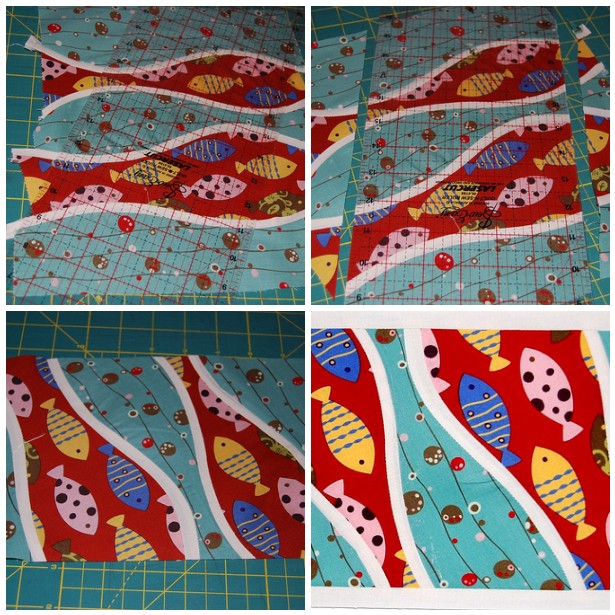
3. Grab the other half of the S shape you cut and piece it alongside the skinny strip in exactly the same way as you pieced the skinny strip. Go slow, hold onto a piece of fabric in each hand and keep twirling them left and right so that the bits under the needle have a 1/4" seam. You can see it looks a bit crumply and messy before you press it. I press the seams in the same direction - i.e. this time press away from the skinny strip.
4. Once pressed, start the whole process over again, this time using the green fabric on the left with a gap of 2-3 inches away from the new fabric (in this case, the red fabric used again), cut a new S, the same way or the other way, or a different wavy shape. The more extreme the curves, the more likely you will have little puckers in the finished piece but I just aim some of my quilting right over these and that squishes them into submission. Here I've added more red and green using the same method each time to finish with a little run of fishy shapes.
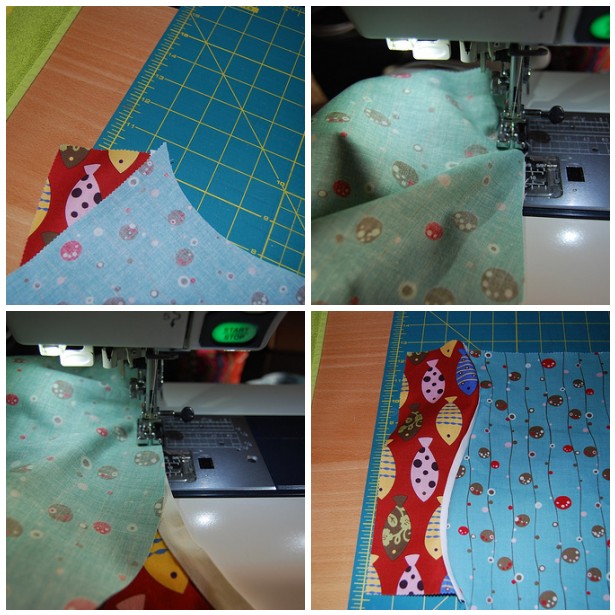
5. Keep adding and pressing until you have as much as you want. Then have fun cutting a shape from your finished fishy fabric - maybe cut straight or at an angle. Maybe cut it into four smaller shapes and re-assemble using skinny strips in between. I cut mine into a rectangle than added a round of skinny strips to the outside.
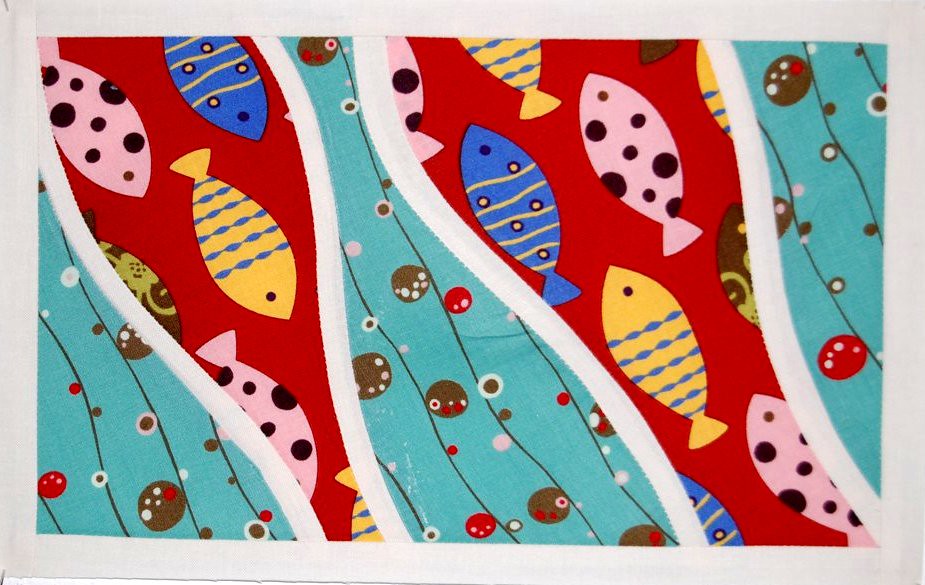
This is the finished piece I made. I haven't decided what to do with it yet - I might make it into a mug rug if I get time later today. If you have a go at this, I'd love to see what you make (even if it's not a finished item, as mine isn't) in the Flickr group.
1. Grab 2 fabrics. Mine were ten inches long (layer cake slices) but, by the time you've finished, they'll be shorter than that in the block so add a couple of inches to the final size you're looking for. Lay one on top of the other, both with their right sides up, one slightly to the left and one slightly to the right. Cut an S shape through both fabrics with your rotary cutter. The first photo in the mosaic below is the finished fishy piecing just so you can see where I was heading in my mind as I went along.
2. Cut a few 3/4" strips of a solid about 1/2" longer than your original pieces of fabric. Now, set your machine to slow (if you have a speed button on your machine) and line a skinny solid strip up against the side of the first wavy cut piece. Start your seam and continue all along the seam, constantly moving the skinny strip and the wavy piece so that the edges of both sit against the edge of your 1/4" foot or against your 1/4" marker. This will make a very crinkly, messy seam. Flip over and press like crazy with steam, towards the skinny strip, You may need to push and pull and cajole and even starch to get all of it to lay flat and it might not quite all lay flat at this point.
3. Grab the other half of the S shape you cut and piece it alongside the skinny strip in exactly the same way as you pieced the skinny strip. Go slow, hold onto a piece of fabric in each hand and keep twirling them left and right so that the bits under the needle have a 1/4" seam. You can see it looks a bit crumply and messy before you press it. I press the seams in the same direction - i.e. this time press away from the skinny strip.
4. Once pressed, start the whole process over again, this time using the green fabric on the left with a gap of 2-3 inches away from the new fabric (in this case, the red fabric used again), cut a new S, the same way or the other way, or a different wavy shape. The more extreme the curves, the more likely you will have little puckers in the finished piece but I just aim some of my quilting right over these and that squishes them into submission. Here I've added more red and green using the same method each time to finish with a little run of fishy shapes.
5. Keep adding and pressing until you have as much as you want. Then have fun cutting a shape from your finished fishy fabric - maybe cut straight or at an angle. Maybe cut it into four smaller shapes and re-assemble using skinny strips in between. I cut mine into a rectangle than added a round of skinny strips to the outside.
This is the finished piece I made. I haven't decided what to do with it yet - I might make it into a mug rug if I get time later today. If you have a go at this, I'd love to see what you make (even if it's not a finished item, as mine isn't) in the Flickr group.
Thanks for this Lynne. I'm definitely going to have a crack at this! Looks like fun, especially not knowing what it will finally end up looking like! Jxo
ReplyDeleteI'm defo' going to have a go at this over the weekend. You make it look so easy. I think my seam ripper will be around the whole time and I promise to post pictures even if I completely muck it up.
ReplyDeleteVery clever piecing!!!Thanks for the tute!
ReplyDeleteHugs.
I will take a stab at this this evening but I have to say it scares the crap out of me. I will take pics along the way so that every can see how it is really screwed up LOL
ReplyDeleteAhhhh.....thank you!! Love this!! I had a thought as I was reading. I am going to try cutting my 3/4" strip on the bias and see if is easier to stretch. I did a quilt (3 actually, that I did for my sons!!) that had large hst cut on the bias. Those little suckers wanted to stretch and bend all over the place.
ReplyDeleteI enjoyed your wonderful post today. You make it look so easy! My blog giveaway is in full swing. Please be sure and enter by April 8th to win a $50.00 gift certificate! Here is the link"
ReplyDeleteHandcrafted by Mary Ann Miller
I am looking forward to giving this a try tonight or on the weekend. Thanks for the detailed instructions!
ReplyDeleteVery clever!
ReplyDeleteMGM
Awesome! You make it look "sew" easy (couldn't help myself -- I'm a writer). Thanks for sharing!
ReplyDeleteoh goodie! a tutorial on curved piecing. Now I don't have to do one and I can send people here! lol. Super cute as always Lynne. I love that this is your "calm before the storm" project.
ReplyDeletehmm. I expected to have to clip edges but voila, not here! Yay!
ReplyDeleteIm not quite sure I understood over 50% of this but I'll give it a try this weekend if I have time because its so darn cute :)
ReplyDeleteOh, this looks like a lot of fun! Thanks for sharing this, Lynne. Those curves are calling me....
ReplyDeletethank you for this tutorial. i'm so scared of curved piecing, but you make it look so doable. i'm not brave enough this late at night, but soon.
ReplyDeletesuper cute tute!
ReplyDeleteDang it! Now that song is stuck in my head too!
ReplyDelete...gonna find my baby, gonna hold her tight, gonna grab some afternoon de-light...
and i'm totally adding Champ's little "boooo!" and "woooop!" sounds (and hand gestures) in there.