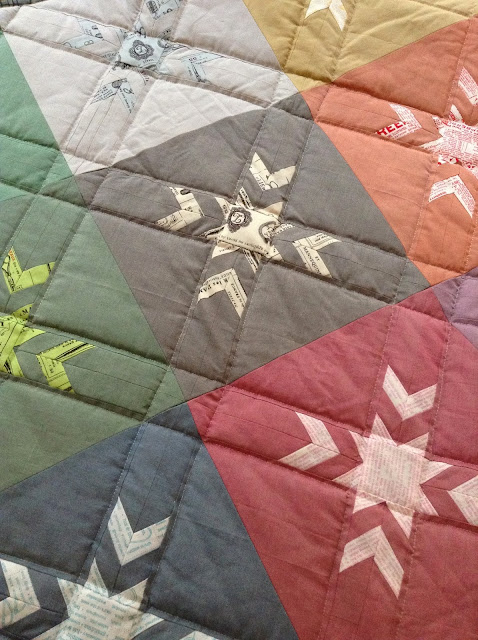
Hi, I´m Aylin from Aylin-Nilya and it´s fantastic to be here as a guest-blogger on Lynne's wonderful blog. I had the chance to make something beautiful with a F8-bundle from Oakshotts called Italy.
When I saw these shimmering colors I knew exactly what I wanted to do with them: a traditional block called spiderlegs in a modern way with text-fabric in the center framed with these wonderful soft colored Oakshotts. I was so excited to get the fabric bundle!
Here is my way to make
spiderlegs-blocks:
If you use a F8 like me, you have to cut very
carefully, because you will need all your fabric and this is the way you are
going to cut:
For the Background (fabric 1) you need 1
rectangle 7x14 inch. Then cut 1 5/8 inch-stripes from the rest. The thinner
stripe above the rectangle is your emergency piece of fabric in case you have
to correct something. If you have some more fabric, you should cut the stripes wider to make the sewing on the paper easier.
Cut your rectangle into 2 7x7 Inch squares and
cut from one corner to the other to get four HSTs.
Then cut a 2,5x2,5 inch square from the
middle fabric (fabric 2) and some strips of 1,5 inch.
Now you need the paper piecing pattern for the spiderlegs. Print it 4 times per block.
When I have longer or bigger parts on a pp-pattern, I fix them
before sewing the other parts on it, so they can not slip away. You can also use glue, but I was a bit
afraid to ruin my soft Oakshotts.
Then fold the first line and cut a ¼ seam
allowance line on fabric 1. Now you see exactly, where to locate fabric 2. Do the
same with the other stripes until your pp-pattern is finished. Be careful, if you
have these 1 5/8 stripes, because you have to place those stripes very well, to cover the whole paper!
Continue until you have eight spiderlegs. Sew two of them together, then remove the paper and iron the seams open.
Now sew the triangles on both sides of one
spiderleg and repeat this with a second spiderleg. Spiderlegs 3 and 4 will be
sewn on the sides of the middle square.
The last step will be, to sew the triangles and
the stripe together to get a square on Point.
I had 12 F8´s in 12 different colors and so I made 12 blocks.


Looks fabulous Aylin!
ReplyDeleteThis is beautiful!! I am not a particularly happy paper piecer and my wee brain is whirring trying to figure out how to do this with flying geese. It's such an effective pattern!
ReplyDeleteStunning Aylin, great effect
ReplyDeleteVery clever block! I like it.
ReplyDeleteThat looks so hard to make! You did a beautiful job. I love the colors.
ReplyDeleteAmanda Rose
sewmuch2say.com
Wonderful!! I love your blog.....it a fav for me now.....going to add you to my blog as a button on the side....if you don't have a button I will give your link reference....I can't wait till 2 of my 8 grandgals come....I am going to print off some of your barns for them to color up..and take them also to Ohio when we go for the grandygals there....Thanks again!!
ReplyDeleteSweetly Beautiful! Thanks for sharing.
ReplyDeleteThis is beautiful! I love the Oakshotts mixed with text fabrics. Great quilt.
ReplyDeleteAmanda
Aylin did a beautiful job on this quilt. I really want to try it with my Oakshott bundle
ReplyDeleteLove the combo with the texty fabrics :o)
ReplyDeleteFabulous pattern
ReplyDeleteIt's a beautiful quilt!
ReplyDeletei haven't seen this block before - what a great use of those fabulous Oakshotts!!
ReplyDeleteJust beautiful!
ReplyDelete