
Hi, this is Sarah from Narcoleptic in a Cupboard. A while ago I was so lucky to be given the chance to make something with the beautiful Oakshott Impressions range, courtesy of Lilys Quilts and Oakshott Fabrics. The fabrics arrived quickly and did not disappoint at all - 16 colours shot with white, the effect of which is so soft and shimmery; it's wonderful.

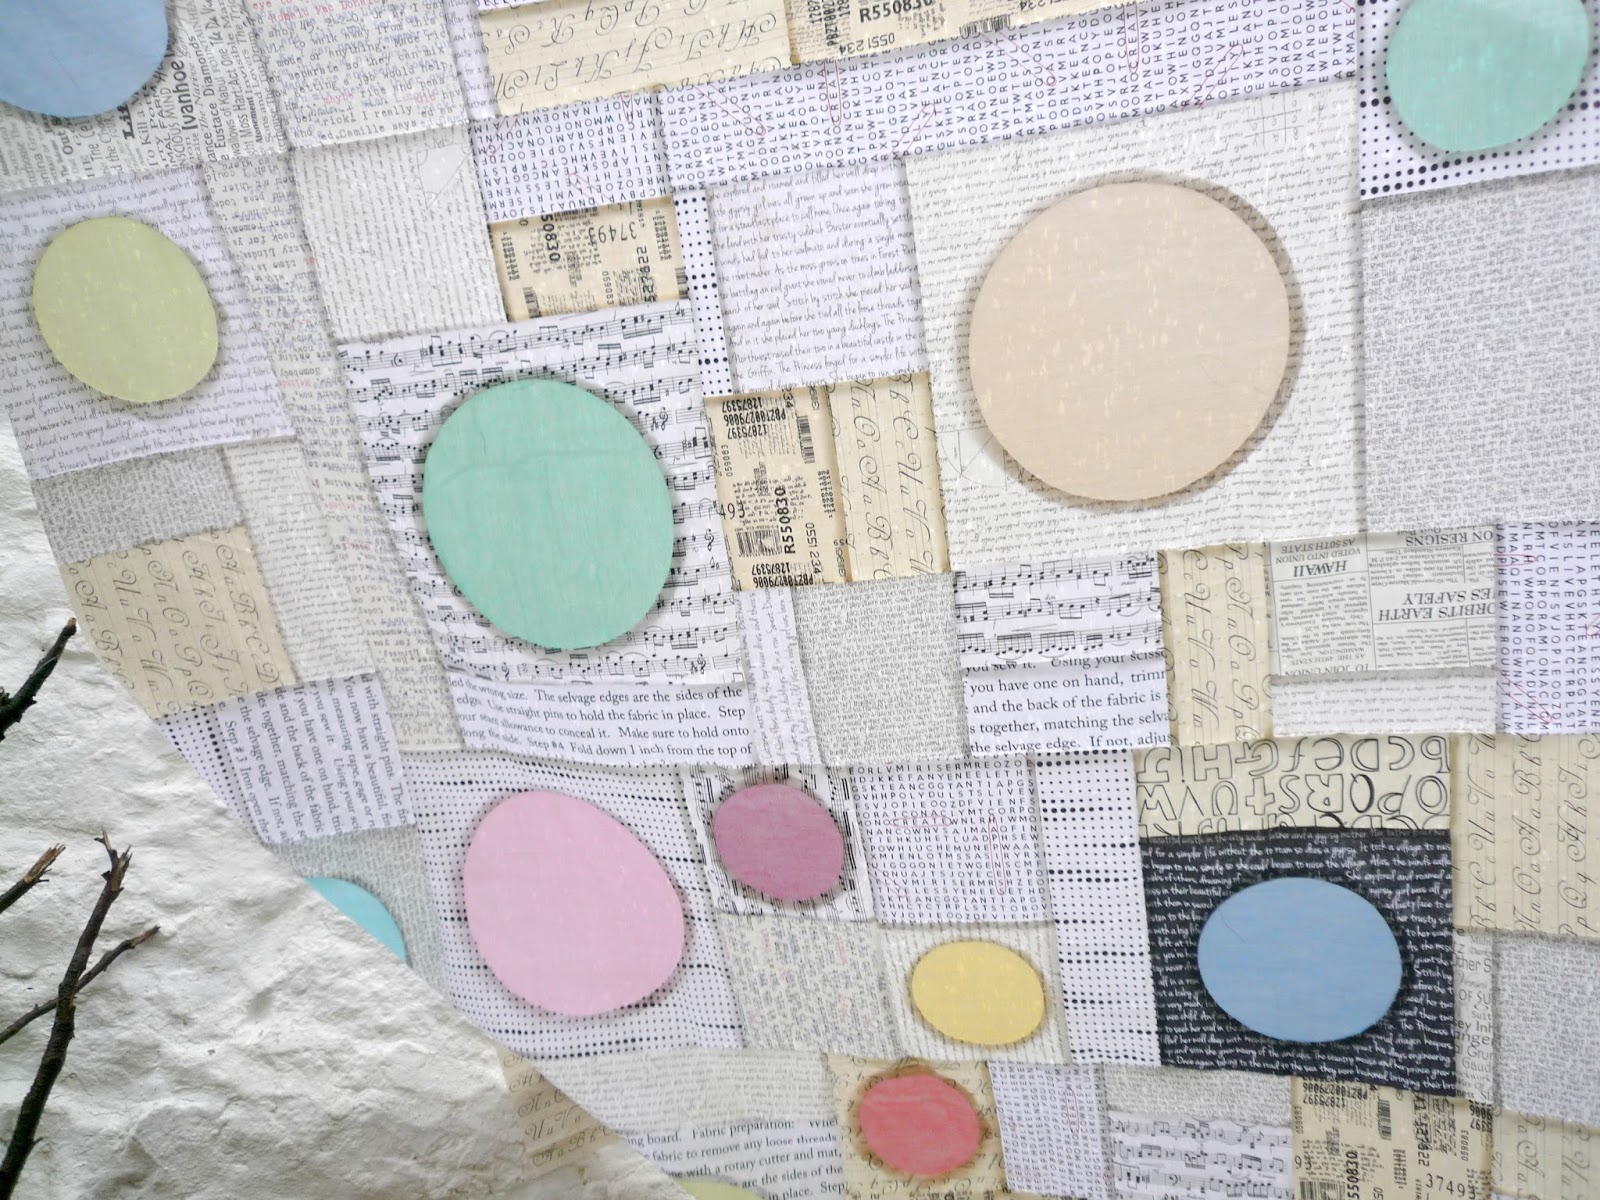
Life interviened for a while, but I've finished the quilt top and would love to show it to you. My proposal was to do something with Oakshott, texts, and circles. This is what I've come up with.

Here is how I inset the circles. The method is fast, it is simple, and once you've done one, you will be hooked. You will need:
- background fabric, cut your square about an inch or so bigger than you require your finished block to be so you have room to trim when you're finished;
- circle fabric, cut a square about an inch bigger than the size (diameter) circle you want;
- freezer paper, cut a square about 2 or 3 inches bigger than your finished circle size;
- glue stick, Frixion pen (or other disappearing marker); and
- scissors.

1. Draw your desired circle on your freezer paper and carefully cut the circle out keeping the freezer paper intact outside the circle. Try and centre the circle as best you can so there is a good 1" to 1.5" of freezer paper all around the circle. Press the freezer paper on to your background fabric square.
2. Roughly draw a circle about an inch smaller onto the fabric, so you can cut it out and have a good half inch of fabric still inside the freezer paper circle hole all the way around. At this stage I also draw around the edge of the freezer paper so that I have a perfect circle on the fabric in frixion pen.
3. Snip all around the fabric, making sure NOT to go so far as the freezer paper - incisions between 1/8th to 1/16th inch away from the paper should work.

4. Glue the newly created tabs and fold over to stick on to the freezer paper. This should give you a neat circle in your desired finished size.
5. Now glue the other side of the same fabric tabs.
6. Stick down your circle fabric, right side down, taking care to position it so that you have the same amount of fabric on each side, it should be about half an inch all around. Now leave the glue to dry completely. Why not prep another whilst you wait!

7. Carefully peel the background fabric off the waxed side of the freezer paper.
8. Again, taking care, peel the freezer paper off the glued on tabs of background fabric. It helps if you keep a finger on the tabs holding them down as you lift the paper up.
Steps 7 and 8 do require care and attention, but you will get the hang of it quickly!

9. How things should look with the paper removed!
10. Follow the example of diagram nine and have the background fabric sitting wrong side up, and the surplus fabric sitting where the inside of your circle will be. Find your marked on circle line, and stitch on the line all the way around. Set your machine to a nice short stitch, and take things nice and slowly so you dont get any unwanted folds or puckers.
11. How things should look after stitching!

12. You can trim the excess circle fabric now so that you have a nice quarter inch seam all around.
13. How things look after trimming circle fabric.
14. Right side up, there might be a teeny bit of a wave or wobble but a good press should sort this out.
15. Trim block to desired size.

Again, many thanks to Lynne, and to Oakshott for the great opportunity to work with the Impressions Shot Cottons. Such gorgeous fabrics, I think they'd make anything look good.
This comment has been removed by the author.
ReplyDeleteOooh, love this, like a kind of crazy paint palette :o) I think Mary's not had her coffee this morning ;o)
ReplyDeleteGreat quilt Sarah :) very clever!
ReplyDeleteIt is fab Sarah!
ReplyDeleteThat's a genius way of doing inset circles!! And you know how I love your text and coloured shape quilts - so, so lovely!
ReplyDeleteGreat tute Sarah, and this quilt is going to be stunning!
ReplyDeletePretty awesome quilt top! Well done!
ReplyDeleteWhat a clever way to make circles ~ lovely quilt and wonderful tutorial!
ReplyDeleteWow! Its gorgeous! Great tutorial too x
ReplyDeleteThe quilt is beautiful and the tutorial is lovely and easy to understand.
ReplyDeletegreat quilt! and a great tutorial. thank you!
ReplyDeleteReally a wonderful method. It is turning out splendid. The colors are amazing.
ReplyDeleteLove the Oakshott, and those circles you made... Glorious!! Thanks for an excellent tutorial.
ReplyDeleteGreat tutorial and love the quilt. Those muted shades are fantastic with the print fabrics
ReplyDeleteI may actually be ok trying circles now!
ReplyDeleteGreat method, and really beautiful quilt top xxx
ReplyDeleteThis method is the only way I've ever managed to get my inset circles to not look like a dogs breakfast - great tutorial! Lovely quilt top x
ReplyDeleteFab tute Sarah! Want to do more with circles - this would be a great place to start
ReplyDeleteWhat a fabulous tutorial Sarah
ReplyDeleteAbsolutely gorgeous quilt and great tutorial!
ReplyDeletegorgeous!
ReplyDeletegreat tutorial and a beautiful quilt
ReplyDeletethanks!!
Great tutorial with lots of useful photos...actually looks like something I could manage!
ReplyDeleteLove love love! Nuff said! Xx
ReplyDeleteI have saved this for future reference....You is smart!!!!
ReplyDeleteperfect...I do not know if I could do it and have it turn out like yours
ReplyDelete